Glazing...It Turns Good Bread to Beautiful Bread!
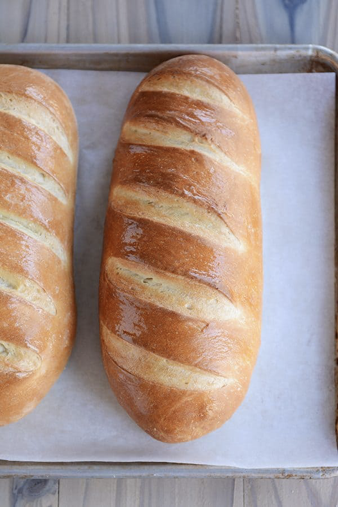
While it’s true that what you put in your loaf has much more to do with the way your loaf turns out than what you put on your loaf, the fact is that glazing the exterior of your loaf can definitely help you achieve the effect you are after (i.e., soft, sweet, crusty, etc). It is, literally, “the icing on the cake.” (Below is a beautiful example of this in homemade French bread from www.melskitchencafe.com.)
I found an excellent tutorial dealing with glazing bread goods on a favorite website, www.thefreshloaf.com., where you can find news and information for amateur bakers and artisan bread enthusiasts. If you like to bake bread and rolls, then you’d really appreciate this site.
For instance: One of their bakers made a batch of rolls and glazed each one with something different before scoring them. Photos compared them one-by-one. Note the differences:
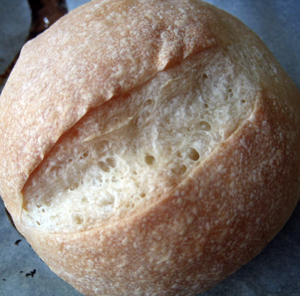
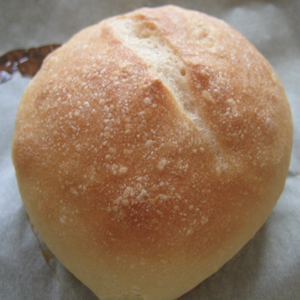
First is the control, with no glaze. The color was fairly light, the crust dry but not particularly crusty or crackly. There was not any particular shine to the rolls.
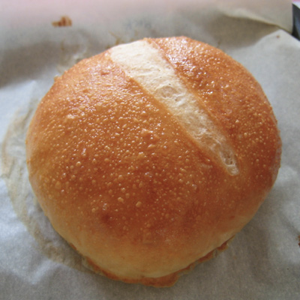
The one glazed in egg yolk came out the darkest. It stayed relatively soft, had a nice shine to it, and a slightly sweet, rich flavor.
Egg whites also created a nice shiny coat and kept the crust soft. Adding a touch of salt to the egg whites helps break it down so it can be brushed on easier (if you fail to do this you notice bare patches here and there).
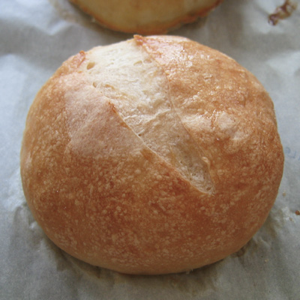
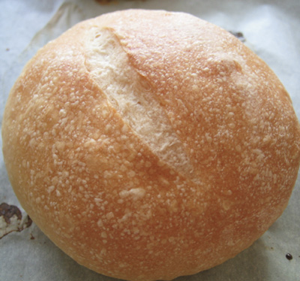
Water (top photo) and milk (directly underneath photo) both kept the crust on the soft side and gave the roll a soft, satiny coat. Milk is supposed to also darken the crust a bit more than water, though I didn't notice a significant difference here. The difference is more pronounced for a loaf that has to bake for 45 minutes than it is for a roll that bakes for 20 to 25 minutes.
Cream can also be used to glaze a loaf of bread. It is supposed to give the loaf an even richer, darker glaze (though not as dark as the egg yolk glaze).

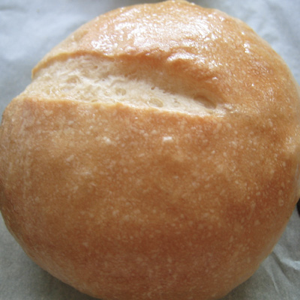
Butter is a standard glaze. It can easily be applied after the rolls are removed from the oven: this was you don’t need to melt your butter. The hot rolls do it for you. Butter creates a very nice shine, which darkens the crust color noticeably, and gives the rolls a moist, rich glaze.
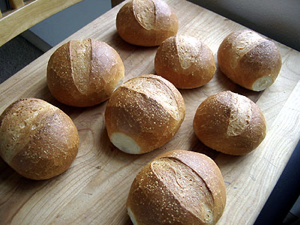
If crispy crust is what you are after, the secret is not to glaze. Instead, you need to fill the oven with steam in the first few minutes. As you can see, the exterior of these is crusty and crackly. This crust is achieved by pouring a cup of hot water into a hot baking pan on the shelf below where the rolls sit. The water will evaporate, filling the oven with steam, and will result in wonderful crusty rolls.
There are many other things that make a good glaze: a whole beaten egg, a mixture of egg and milk, fruit or vegetable juice, and so on.
Besides adding flavor and creating a matte or shine to a crust, glazing also make a good base with which to glue on seeds or grains to the exterior of your loaf. This is a professional baker’s secret to turning good breads into beautiful breads, and it’s worth your while to experiment with them.
I’ll close with a favorite recipe from this site, their buttermilk rolls. It’s a perfect bread good to mess around with glazing and seed toppings. See what you think:
6 to 6 1/2 cups all-purpose unbleached, bread or flour
1/2 tablespoon salt
1 envelope (or 2 1/2 teaspoons) active dry yeast OR instant yeast
1 tablespoon warm water
1 3/4 to 2 cups buttermilk
1 tablespoon raw honey
GLAZE
1 egg beaten with 1 teaspoon water
TOPPING
1 to 2 tablespoons seeds (poppy, sesame) or grains (cracked wheat, rolled oats)
Directions:
I found an excellent tutorial dealing with glazing bread goods on a favorite website, www.thefreshloaf.com., where you can find news and information for amateur bakers and artisan bread enthusiasts. If you like to bake bread and rolls, then you’d really appreciate this site.
For instance: One of their bakers made a batch of rolls and glazed each one with something different before scoring them. Photos compared them one-by-one. Note the differences:
First is the control, with no glaze. The color was fairly light, the crust dry but not particularly crusty or crackly. There was not any particular shine to the rolls.
The one glazed in egg yolk came out the darkest. It stayed relatively soft, had a nice shine to it, and a slightly sweet, rich flavor.
Egg whites also created a nice shiny coat and kept the crust soft. Adding a touch of salt to the egg whites helps break it down so it can be brushed on easier (if you fail to do this you notice bare patches here and there).
Water (top photo) and milk (directly underneath photo) both kept the crust on the soft side and gave the roll a soft, satiny coat. Milk is supposed to also darken the crust a bit more than water, though I didn't notice a significant difference here. The difference is more pronounced for a loaf that has to bake for 45 minutes than it is for a roll that bakes for 20 to 25 minutes.
Cream can also be used to glaze a loaf of bread. It is supposed to give the loaf an even richer, darker glaze (though not as dark as the egg yolk glaze).
Butter is a standard glaze. It can easily be applied after the rolls are removed from the oven: this was you don’t need to melt your butter. The hot rolls do it for you. Butter creates a very nice shine, which darkens the crust color noticeably, and gives the rolls a moist, rich glaze.
If crispy crust is what you are after, the secret is not to glaze. Instead, you need to fill the oven with steam in the first few minutes. As you can see, the exterior of these is crusty and crackly. This crust is achieved by pouring a cup of hot water into a hot baking pan on the shelf below where the rolls sit. The water will evaporate, filling the oven with steam, and will result in wonderful crusty rolls.
There are many other things that make a good glaze: a whole beaten egg, a mixture of egg and milk, fruit or vegetable juice, and so on.
Besides adding flavor and creating a matte or shine to a crust, glazing also make a good base with which to glue on seeds or grains to the exterior of your loaf. This is a professional baker’s secret to turning good breads into beautiful breads, and it’s worth your while to experiment with them.
I’ll close with a favorite recipe from this site, their buttermilk rolls. It’s a perfect bread good to mess around with glazing and seed toppings. See what you think:
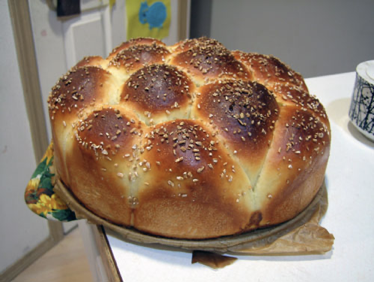
BUTTERMILK CLUSTER
Yield: 12 to 18 rolls
Serving size: 1
Calories per serving: 2,630
Ingredients:
Serving size: 1
Calories per serving: 2,630
6 to 6 1/2 cups all-purpose unbleached, bread or flour
1/2 tablespoon salt
1 envelope (or 2 1/2 teaspoons) active dry yeast OR instant yeast
1 tablespoon warm water
1 3/4 to 2 cups buttermilk
1 tablespoon raw honey
GLAZE
1 egg beaten with 1 teaspoon water
TOPPING
1 to 2 tablespoons seeds (poppy, sesame) or grains (cracked wheat, rolled oats)
Directions:
Combine the flour and salt in a large bowl. Combine the warm water and yeast in a small cup and allow to proof for 10 minutes.
Pour the yeast, buttermilk, and honey into the flour mixture and mix well. If the dough is so dry that some of the flour won't stick, add a bit more buttermilk or water. If the dough is too sticky to knead, more like a batter, add more flour by the tablespoon until the correct consistency is achieved.
Knead by machine or hand for approximately 10 minutes. Return the dough to the bowl, cover the bowl with plastic wrap or a damp cloth, and set aside to rise until the dough has doubled in size, approximately 90 minutes.
Divide the dough into 12 to 18 pieces. If you are a stickler you can scale them so that they are even, but I just cut them roughly the same size. Shape each piece into a neat ball and place in a round dish or 12-inch spring-form, pan close together.
When all of the rolls are in the pan, cover again with plastic or a damp towel and set aside to rise again for 45 minutes to an hour. Meanwhile, preheat the oven to 425.
At end of rising time, uncover the rolls and brush gently with the egg wash. Sprinkle on the grain topping, if you like.
Bake for approximately 30 minutes, until the rolls are firm and spring back when tapped.
Release the rolls from the pan and serve warm.
Recipe formatted with the Cook'n Recipe Software from DVO Enterprises.
Sources:
- www.thefreshloaf.com
 Alice Osborne
Weekly Newsletter Contributor since 2006
Email the author! alice@dvo.com