How to Make Paninis Without a Panini Press
We’ve all been there; you’re craving an ooey-gooey panini, but there’s a problem. You don’t have a panini press! Luckily, you don’t have to crowd your countertop with another appliance for a cafe-worthy panini. Our Test Kitchen has a secret for a press-free panini.
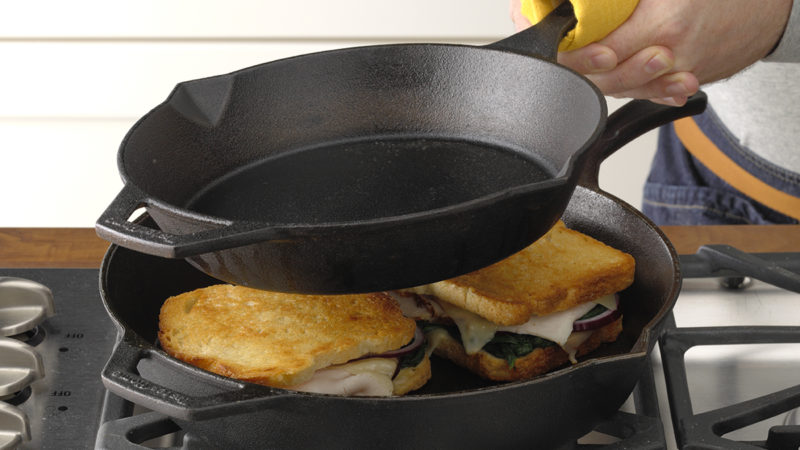
Step 1: Pull Out Your Cast-Iron Skillets
The secret for a crispy panini is to use two hot cast iron skillets to toast the sandwich. To start, preheat two cast-iron skillets over medium-high heat. If you can, use one skillet that is slightly smaller than the other so they can be stacked.
Step 2: Assemble the Panini
While your skillets are heating up, put your panini together. You can use whatever meat, cheese and veggies you’d like, but we’d suggest using a heartier bread, like ciabatta, French bread or thick-sliced sourdough.
Step 3: Cook the Panini
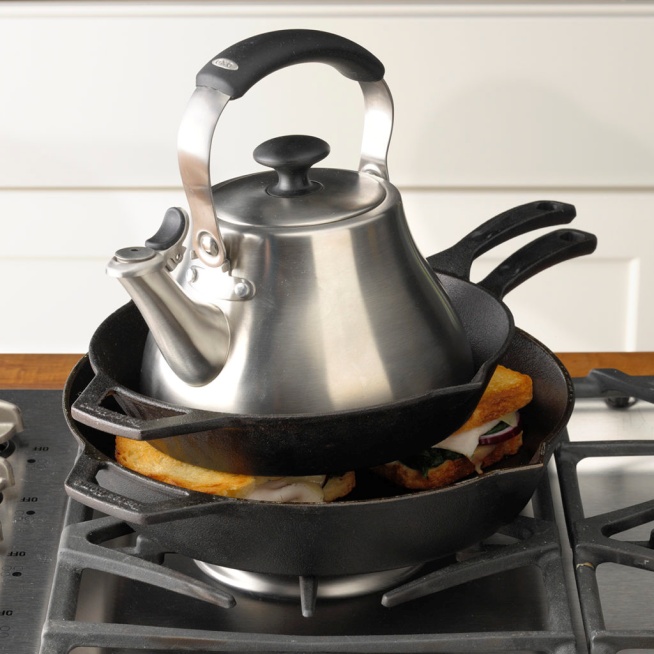
Add some oil to one of the skillets (the larger of the two, if possible) and use a paper towel to oil the bottom of the other cast-iron skillet. It will be very hot, so be careful! Put your sandwich in the skillet and then place the second skillet on top of the sandwich, pushing it down a bit.
Then, place a heat-safe weight, like a filled tea kettle or saucepan, on top of the second skillet to apply pressure. Let the sandwich cook for about 4 minutes, or until it’s golden brown and toasty.
Step 4: Eat!
When the panini is done, carefully remove the weight and cast iron skillet and remove the sandwich from heat. Transfer it to a plate, slice in half and enjoy your melty panini.
Once you’re done, clean your cast-iron skillet the right way.
Sources:
- Source: https://www.tasteofhome.com/article/how-to-make-paninis-without-a-panini-press/