Beat the Heat with Frozen Pie and Icebox Cake!
Beat the Heat with Frozen Pie and Icebox Cake!
To be honest, I don't spend a lot of time in the kitchen during the summer (and I bet you relate!). When temperatures hit the 80s and 90s, the idea of standing over the stove or pulling something out of the oven is just not that appealing.
That leads me to the topic of refrigerated (and frozen) desserts this week. These are the sort that require minimal oven time, and build in lots of chilling (read: relaxation for you) time.
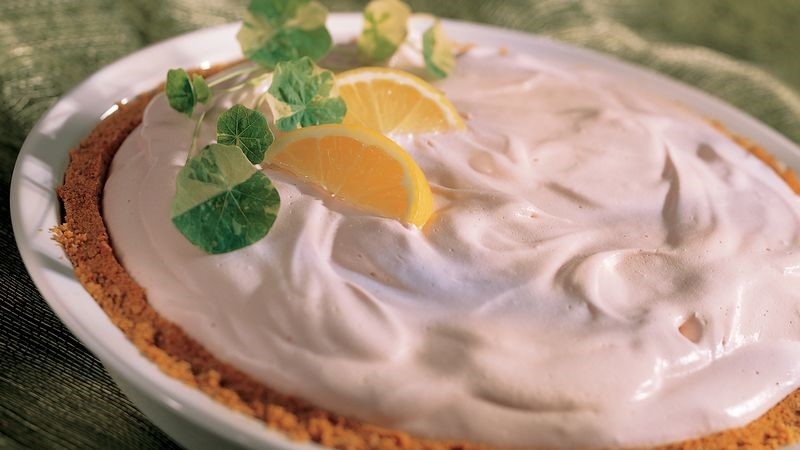
If there's ever a reason to have a couple of good base recipes up your sleeve, icebox desserts are it. And icebox pies are the perfect GO-TO for a cool treat at the end of a hot summer day.
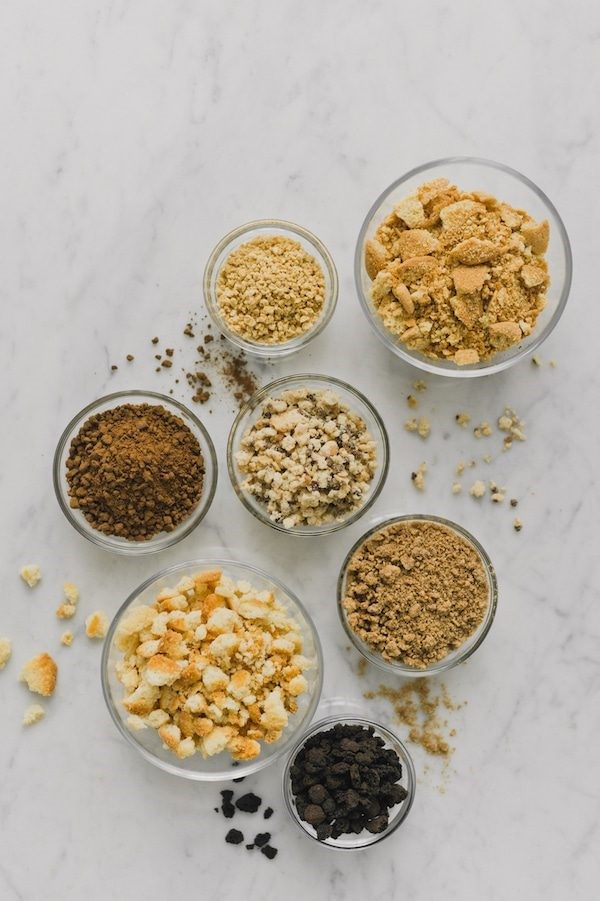
You can always use a typical graham cracker crust for building an icebox pie. And this works. But you might want to get more creative and use cookies instead. We like to crush leftover cookies (I know..."leftover cookies" is such an oxymoron...that's pretty rare, right?) in place of the graham crackers in our crust recipe. Crushed peanut butter cookies are just amazing as a crust for frozen chocolate pies.
And then there's chocolate chip cookies. Crush these well and use them as a crust base for caramel-oriented frozen pies.
Sugar cookies make a great crust for your vanilla and fruit-oriented frozen pies. Their more neutral flavor doesn't interfere with the flavor of the filling.
Starting with any of these three basic cookie pie crusts can lead you to dozens of icebox pie creations. Just use your imagination to fill the crust(s) to your liking (fruit, pudding, whipped cream, and chocolate mousse come to mind).
And while we're on the subject of frozen chocolate mousse, have you tried using chocolate wafer cookies for a refrigerated or frozen pie crust? They make an absolutely fantastic cookie pie crust, but they're also a brilliant starting point for icebox cakes.
For instance, just layer the bottom of a glass baking dish with chocolate wafers. Then top them with a thick coating of sweetened whipped cream. On top of the cream add another layer of chocolate wafers. Finish it all off with another thick layer of the whipped cream. Cover and refrigerate this overnight. The cookies will slowly absorb some of the cream, softening a bit. The result is a delicious sort of chewy creamy chocolateness.
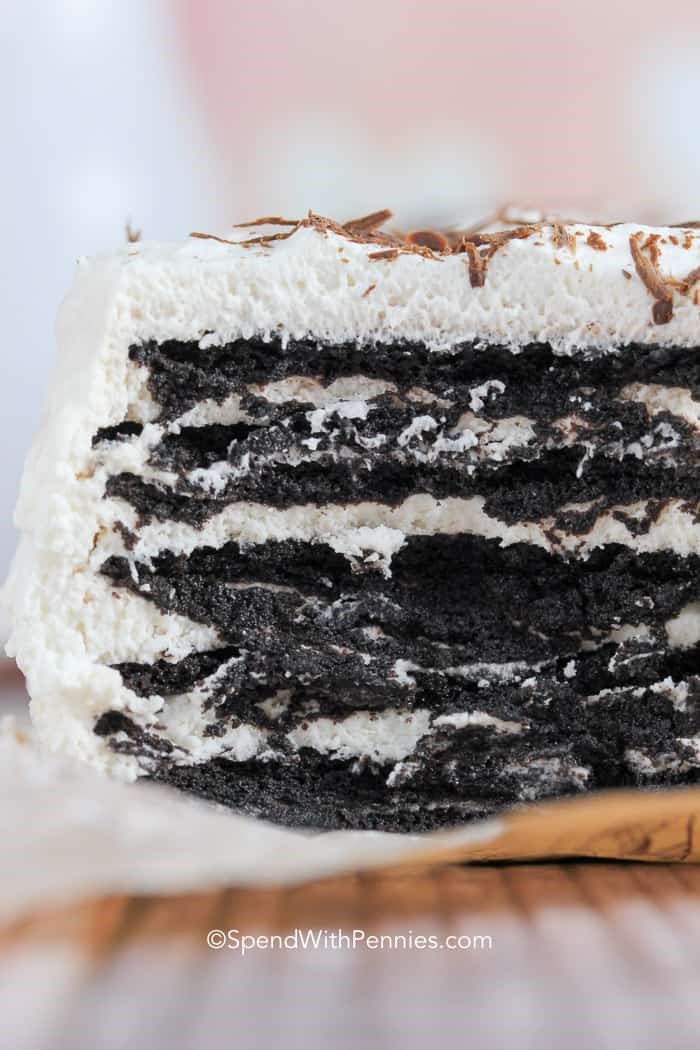
I make another variation on this chocolate icebox cake by using Lorna Doone Shortbread cookies. Same procedure�place a layer of Lorna Doones on the bottom of a glass baking dish, but then I top the cookies with roughly mashed fresh peaches. Next I cover the cookies and peaches with a thick layer of sweetened whipped cream. I repeat the layers, ending with a thick layer of whipped cream. Cover this and refrigerate overnight. This is positively one of our favorite desserts.
You savvy Cook'n cooks already beat the heat with frozen pies and icebox cakes, I'm sure. But the validation is nice, isn't it? To thank you for reading, here's a recipe for one of our favorite frozen pies. I first found this on the King Arthur Flour site (www.kingarthurflour.com) and I don't just wait for summer to make this jewel!
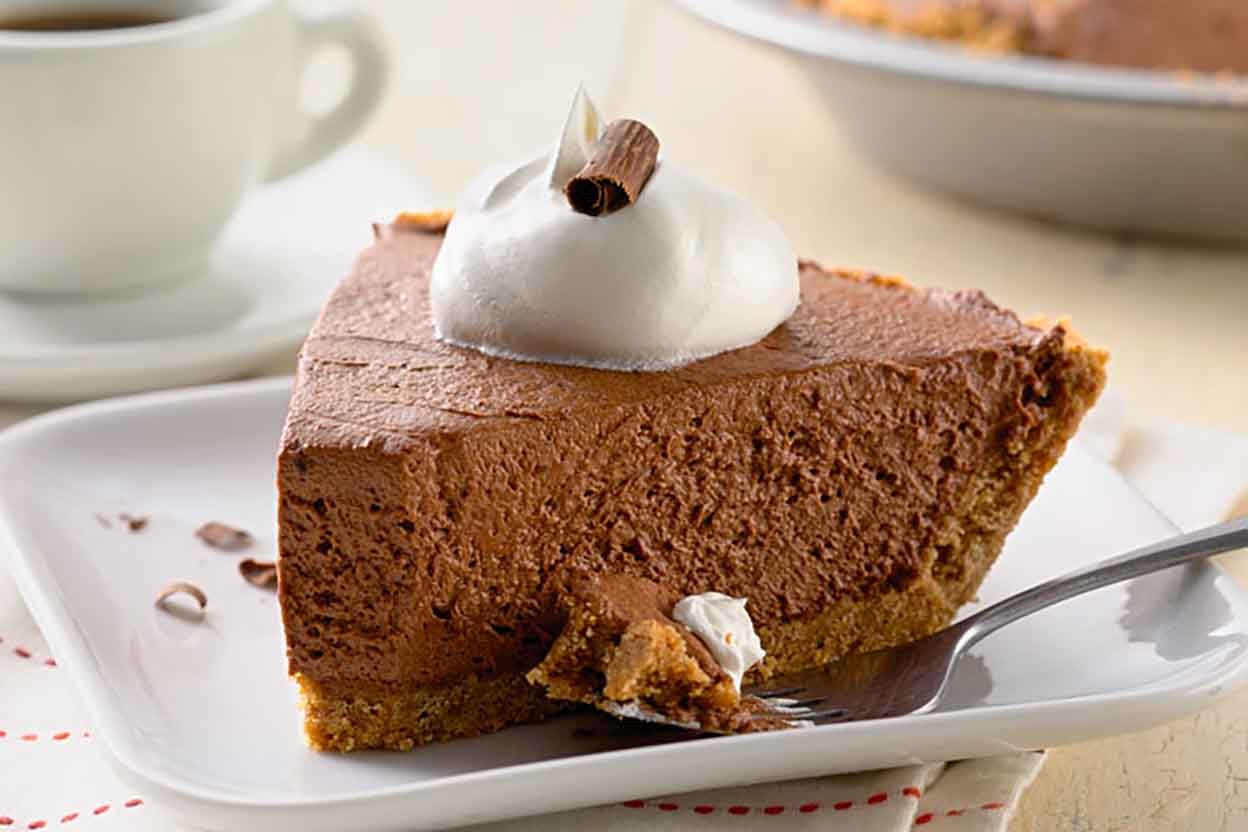
Decadent Frozen Chocolate Pie
Cook time:
Yield:
Serving size: 1
Calories per serving: 2,125
CRUST
1 1/4 cups finely crushed chocolate wafer crumbs or graham cracker crumbs
1/4 cup sugar
1/2 teaspoon cinnamon or graham cracker crumbs
5 tablespoons unsalted butter melted
FILLING
1/3 cup hot water
2 tablespoons all-purpose unsweetened cocoa or double-Dutch dark cocoa
1 tablespoon vanilla extract
1 1/3 cups bittersweet chocolate chips chunks, or disks
1 1/2 cups heavy cream
1 tablespoon sugar
1/8 teaspoon salt
TOPPING
1 cup heavy cream
2 tablespoons confectioners' sugar
Directions:
2. To make the crust: Combine the ingredients, and press the mixture into the bottom and up the sides of the pan. Freeze the crust for 15 minutes (this will prevent over-browning), then bake for 8 to 10 minutes, until it's lightly browned around the edges. Remove from the oven and cool completely.
3. To make the filling: Combine the hot water, cocoa, and vanilla in a small measuring cup and set aside.
4. Heat the chocolate in a saucepan set over low heat on the stove, or in the microwave in 20-second bursts. Stir the chocolate until completely melted, and let cool for several minutes.
5. Whip the cream, sugar, and salt with a hand or stand mixer until soft peaks form.
6. Stir the cocoa mixture into the melted chocolate.
7. Using a whisk, fold the chocolate mixture into the whipped cream until no white streaks remain.
8. Spread the filling evenly into the cooled crust.
9. Refrigerate the pie for at least 1 hour before serving, or until the filling is firm.
10. For the topping, whip the cream and sugar together until the mixture is as firm (or soft) as you like.
11. Slice the pie, and top each serving with a dollop of whipped cream and a chocolate curl, if desired.
Recipe formatted with the Cook'n Recipe Software from DVO Enterprises.
- www.kingarthurflour.com
- www.spendwithpennies.com
- www.creativefoods.com
- www.bettycrocker.com
 Alice Osborne
Weekly Newsletter Contributor since 2006
Email the author! alice@dvo.com