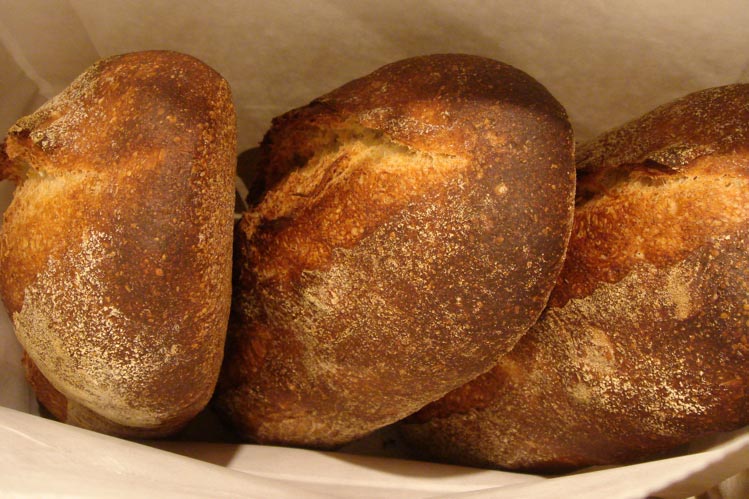
Make Your Own Sour Dough Starter, Sponge, and Bread!
I’ve tasted wild yeasted bread. It has a more complex flavor compared to bread leavened with commercial yeast. This is because when flour and water are left out for several days, yeast in the air and the flour feed off the sugars released by the enzymes in the dough. These natural yeasts create a sour flavor in the form of lactic and acetic acids.
And ever since that first taste, I’ve wanted to make my own wild yeasted bread—my own sour dough bread, but to do that I needed to learn how to make my own sour dough starter.
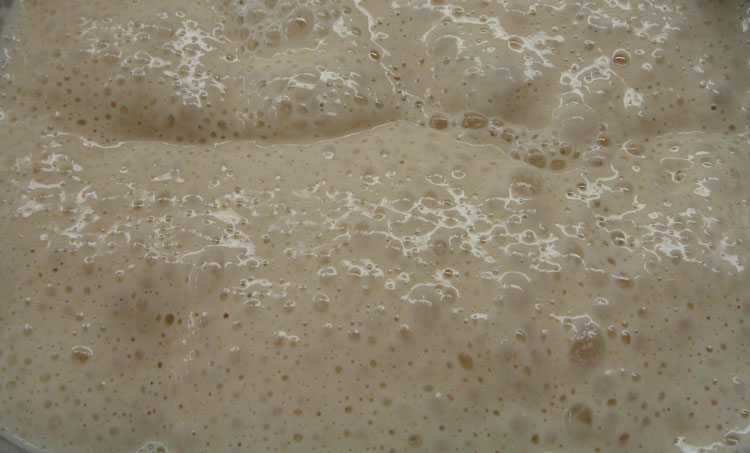
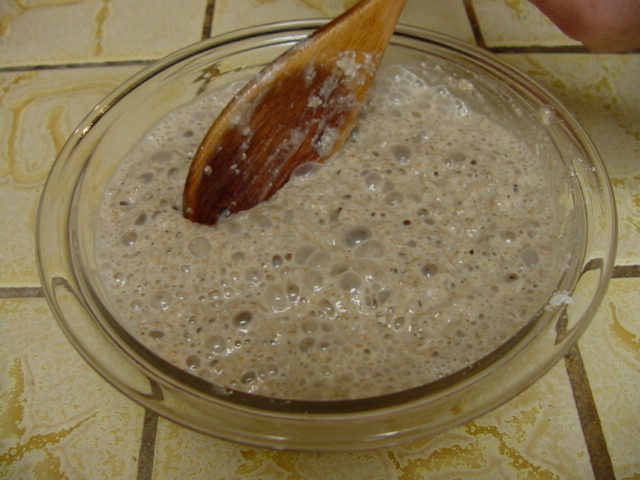
Starter is a leaven consisting of a loose batter of flour and water in which yeast is continually re-producing, helped along with regular weekly feedings of more water and flour. As the yeast in the starter consumes this fresh food and digests the sugars in the flour, they not only remain alive and kicking but they reproduce, and expel carbon dioxide, causing little bubbles in the starter. Happily co-existing alongside the yeast are harmless lactic-acid bacteria, lactobacillus, which give sourdough its tangy flavor.
So when a little bit of this starter is combined with flour and water to produce a dough, the yeast within the starter becomes even more active. This increased activity stimulates the dough to rise by producing much-needed carbon dioxide, which is what gives bread its light, airy texture. The dough is then shaped, left to rise again, and baked.
That said, one sour dough baking expert, Mattie (found on www.veganbaking.net), reminds us: “A 100% sourdough bread will not be as light and airy as a bread made with commercial yeast because we're leavening our bread with wild airborne yeasts that aren't specifically engineered for bread baking, like commercial bread yeasts are. Because of this difference, some bakers add a small amount of commercial yeast to their starter to give their sourdough breads an extra boost (called spiking—bread blasphemy!). But I recommend allowing nature to be the bread's guide. The flavor of a 100% wild yeasted bread is worth it.
In a perfect wild yeast starter, the natural airborne yeast and bacteria population get to the point where they have the upper hand and no other harmful yeasts or bacteria can establish themselves. This usually takes about 7 or 8 days depending on several environmental factors. And the longer your starter is going into the 7 or 8 day process of becoming populated, the more resistant it is to contamination. Note that this behavior is similar to other fermented foods such as beer, kraut, etc.
There are loads of ways to make reliable wild yeast starters and some are quite complex. The method used doesn’t significantly affect the final
outcome of the bread texture-wise and flavor-wise, though, so it's smart to keep it simple. As long as you relax, let the yeast and bacteria do the work
and give the starter some simple attention (as described below), there’s no need for complex, confusing regimens.
Finally, we want to understand that wild yeast starters don't have a 100% success rate. Sometimes even if we do everything right it will get infected with
foreign bacteria or it will never get started by the yeast. The bottom line: We're doing a wild fermentation so we're dependent on what nature gives us;
our job is to simply create the conditions ideally suited for these spores and bacteria to thrive and multiply (a warm room, very clean bowl and utensils,
and consistent feeding and stirring).
Does this idea interest you? Then try Mattie’s very easy sourdough starter method. It gives reliable, consistent results. You can use any type flour for a sourdough starter but many bakers report that the best flavor comes from whole wheat flour, rye flour, or a combination of the two. Following is the starter recipe, a simple day-by-day summary of how to make starter, how to use it once it’s ready, and a typical sour dough bread recipe.
½ cup bread flour, whole wheat flour, all-purpose flour or rye flour
½ cup + 2 tablespoons water
Place flour and water in a very clean large bowl or jar and stir until well incorporated. Use glass or stainless steel bowls (non-stainless steel reacts
with the lactic and acetic acids, and plastic bowls produce off flavors due to foods that have been stored in them in the past). Cover the bowl with
cheesecloth secured by a rubber band and let it sit in a warm area over night.
In the morning, stir in about 2 more tablespoons flour and 2 more tablespoons water. In the evening give the mixture another stir. (TIPS: Organic flour is
preferred—it has the least amount of pesticide residue, which can affect the starter’s ability to grow. If your water is heavily treated, use
filtered or bottled water to help promote maximum yeast and bacteria activity. Also, in between stirrings it's normal for the mixture to separate and
leaving a small layer of water on the top.)
The mixture starts to show bubbles within 4 to 7 days, depending on temperature, humidity, and other environmental factors. During these first days,
unwanted yeasts and/or bacteria might inhabit the starter. They should only be there for a couple days, as the rising of the good yeasts and bacteria will
overpower the “outlaws.”
After an additional 2 to 3 days, with the starter continually showing bubbles, it will have generated enough yeast to be suitable for using. (TIP: Feel free to taste it after mixing each day to get a feel for how it's doing. If the mixture starts smelling putrid, a rescue attempt is possible: discard 1 cup of the starter and mix in 1 cup fresh flour and 1 cup water, then proceed with the normal feeding schedule.)
Now how to use our starter: Once the mixture gets to a useable state it's important to use some of it within a few days and replenish it with an amount of water equal to what is removed, plus an equal amount of flour. For example, if you remove 1 cup starter, add 1 cup of water and 1 cup flour and mix until smooth.

And how to maintain starters: I’ve heard of people using starters that are decades old. This is absolutely possible if the starter is maintained properly. Here’s how to do that:
In wild yeast starter, the acids build up twice as fast as the yeast. This usually doesn't turn into an issue because the yeast and bacteria regulate
themselves if it’s regularly fed. Just remember that if the yeast starter runs out of food it will start to smell and taste putrid.
There’s also the option of storing starter covered with an air tight lid in the refrigerator. This way you only need to maintain it once per week by
stirring in 3 tablespoons of flour and 3 tablespoons water and allowing it to “wake up” for about 4 hours before either using it or returning
it to the refrigerator. Just remember when baking to replenish the 1 cup you removed with 1 cup of flour and 1 cup of water.
Now if all this is as clear as mud, here’s a simple summary to making a sourdough starter:
Day 1: Mix 1 cup water and 1 cup flour. Cover with cheesecloth.
Day 2: Add 2 tablespoons flour and 2 tablespoons water stirring twice daily. Cover with cheesecloth.
Day 3: Add 2 tablespoons flour and 2 tablespoons water stirring twice daily. Cover with cheesecloth.
Day 4: Add 2 tablespoons flour and 2 tablespoons water stirring twice daily. Cover with cheesecloth.
Day 5: Add 2 tablespoons flour and 2 tablespoons water stirring twice daily. Cover with cheesecloth.
Day 6:
Add 2 tablespoons flour and 2 tablespoons water stirring twice daily. Cover with cheesecloth.
Day 7:
Add 2 tablespoons flour and 2 tablespoons water stirring twice daily. Cover with cheesecloth.
Day 8: Proceed to making your sponge
The point to making a sponge is to give your starter a large amount of food so it gets a running start before it ends up in your final dough. This will allow your final dough to leaven as effectively as possible. After your starter has reached sufficient size, it is now ready to use in your bread recipe's final dough.
1 cup sourdough starter
1 cup water
1 cup whole wheat flour, bread flour, or all-purpose flour
Mix together starter, water and flour. Allow it to sit for 4 to 12 hours until increased in size (between 50% and 100%). You can place the sponge in the refrigerator overnight, which generates a more flavorful loaf. In this case, remove the sponge in the morning so it can double in size. Check the level of rise by dipping a table knife into the mixture at the beginning and taking subsequent measurements until the sponge is doubled in size.
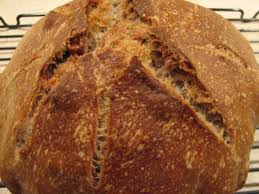
SOUR DOUGH BREAD
(Yield: 1 large round loaf)
Sour dough bread rises much more slowly than bread made with commercial yeast, so be very patient and your end product will be exceptional.
2 cups starter sponge
3 cups flour (combination of whole wheat, bread, all-purpose, rye, etc.), divided
2 teaspoons salt (experts like Kosher salt best)
4 teaspoons sugar
2 tablespoons extra virgin olive oil
Place sponge in mixing bowl. Feed remaining starter and return to refrigerator. Add sugar, salt and oil. Add 2 cups flour. Start mixing on low. Once well mixed, slowly add last cup of flour, a little at a time, until dough consistency is not too sticky—it should want to climb the dough hook. Depending on how wet your sponge was, it may or may not take all the remaining cup of flour, or it may need a little more flour.
From here, the procedure is much like baking any other bread recipe. Increase mixer speed to knead dough for at least 5 minutes. Once done, drizzle olive oil in mixer bowl and turn dough ball several times to coat it and the inside of the bowl. Cover bowl with a clean damp cloth, place bowl in warm location and allow dough to rise until doubled in size. This rising might take several hours.
When doubled, turn dough out onto a floured surface and punch down. Form it into a ball and place it on a cookie sheet sprinkled with corn meal.
Place loaf on top rack of oven. On bottom rack place a wide pan filled with boiling hot water. Close oven door and leave loaf to do a second rise. When dough is doubled in size, slash the top of the loaf. Remove pan of water but keep bread in oven. Do not preheat the oven. Simply start the oven set at 350°F. Set timer for 40 minutes.
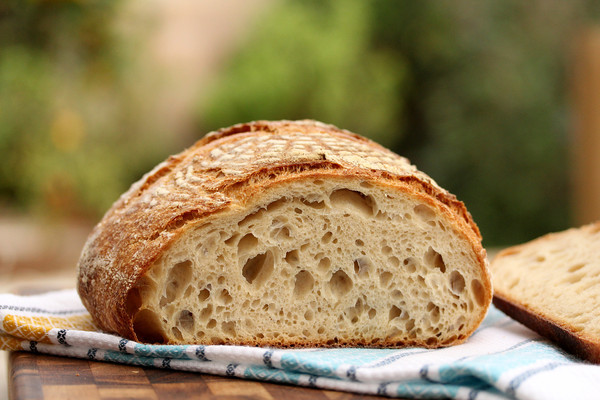
When timer goes off, check bread; the crust should be firm, dark, and crisp. When thumped, the bread should sound hollow. Leave it in for a few more minutes if it doesn’t seem done enough. Allow finished bread to cool on a wire rack.
- www.wildyeastblog.com
- www.karenskitchenstories.com
- www.baking911.com
- www.suegregg.com
- www.baroquesicily.com
- www.food.com
 Alice Osborne
Weekly Newsletter Contributor since 2006
Email the author! alice@dvo.com