Cooking Class 101: Braising "How-Tos"
Let’s talk braising. This is a cooking method that is slow, with the food being covered in liquid. While vegetables braise relatively quickly, most folks use braising for meats—usually tough, cheap cuts that turn tender after this long, gentle cooking. My braising know-how came from a study of the research done at America’s Test Kitchen. Here’s what they say:
Pot roast, pork shoulders, shanks, brisket, and ribs all have enough connective tissue to be good options for braising. Leaner, more tender cuts, such as steaks, don’t benefit much from braising.

And it’s this connective tissue that makes some meat (like short ribs) tough. When it is cooked beyond 140 degrees, it begins to break down into gelatin, the protein that makes for tender meat. This tissue breaks down most efficiently in a moist environment at temperatures around 200 degrees. The best way to encourage the break down into gelatin is by putting the meat and liquid in a covered Dutch oven in a 300-degree oven and letting it cook for a long time.
The Dutch oven is sturdy, roomy, and trustworthy. It conducts heat well (helping the meat get a good sear), and it’s also outfitted with a tight-fitting lid.
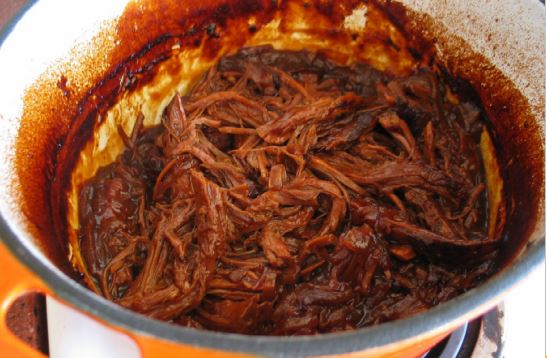
One important thing to know about braising is that even though the technique is slow-and-low (time- and temperature-wise), braised meat can be overcooked, driving out so much of the meat’s moisture that it becomes dry. This is when it goes beyond sliceable and on to shredded. While it can be salvaged for sandwiches, salads, or soups, it won’t make a presentable Sunday roast. So the Test Kitchen’s advice? Cook braises just until fork-tender, then stop.
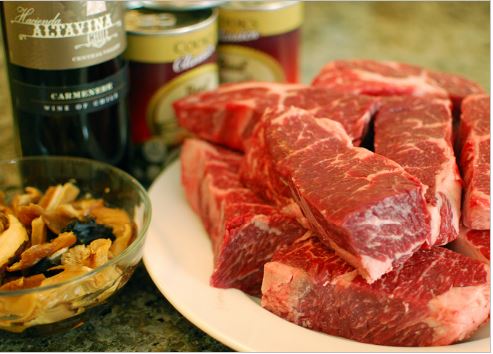
Now speaking of short ribs, let’s get to know them. As their name implies, they are ribs cut from any part along the cow’s ribs: the lower belly, the shoulder (or chuck), or the forward midsection. There are three cuts encountered most often in the grocery store meat department.
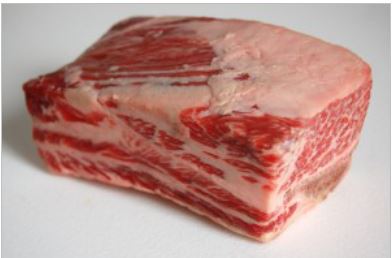
TOP CHOICE (boneless): These are the easiest to work with and eat—if you know how to compensate for the flavor and body lost by removing the bone.
BEST BONE-IN CHOICE (English-style): English-style ribs are 2- to 4-inch lengths of bone with a wide piece of fatty meat attached. These are plentiful in the meat department and are usually cheaper than flanken, which is why America’s Test Kitchen recommends them over flanken.
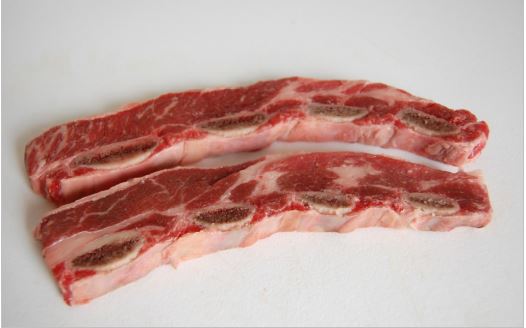
NOT RECOMMENDED (flanken-style): These are about ¾ inch thick, cut across the ribs and grain, and include two or three segments of rib bone. Test Kitchen experts found them harder to eat than the English-style ribs.
And did you know you can make your own boneless ribs from bone-in English-style ribs? All it takes is a few minutes and a sharp chef’s knife. Position the knife as close to the bone as possible, then carefully slice away the meat. Trim and discard the hard fat and silverskin from both sides of the meat and voila—you have top choice boneless ribs!
Still on braising short ribs, here is the recommended procedure from America’s Test Kitchen:
- 1. Move oven rack to the lower-middle position and preheat the oven to 300 degrees—moderate heat provides a more even heat than the stovetop.
- 2. Brown (carmelize) in two or more batches until well browned. Crowding the pot will steam the ribs instead of browning. Caremelizing the crust means a more flavorful braise.
- 3. Saute the aromatics (usually onions, tomato paste, and garlic cloves) in your rendered beef fat. This creates a rich flavor base for the braising liquid.
- 4. Add wine and reduce it by half, scraping up the browned bits. This cooks some of the alcohol out and concentrates its flavor. Then add your broth.
- 5. Add ribs and cover pot. Braise for two hours or more, until they’re fork-tender. A tight fitting lid traps heat and steam and prevents evaporation, creating a slow, tenderizing simmer.
- 6. During cooking, turn the meat in the braising liquid twice to ensure that they’ll cook evenly.
- 7. After two hours, test the meat for tenderness by piercing with a fork to see if it’s done.
- 8. When finished cooking, remove the meat to a platter and let it rest so the meat juices, squeezed outward during cooking, can redistribute, ensuring juicy ribs.
- 9. Strain the contents of the pot into a large bowl to turn the vegetable-studded braising liquid into a smooth sauce.
- 10. Pour the sauce into a fat separator. Let it settle for five minutes; return the liquid to the pan, leaving the fat behind in the separator (no one likes greasy sauce).
- 11. Reduce the strained, de-fatted sauce on the stovetop for five to 10 minutes to thicken slightly and concentrate its flavor.
- 12. Add gelatin to this reduced sauce. Dissolve one package of Knox® gelatin in a small bowl of cold water and then stir it into the pot. The gelatin makes the sauce silken and full-bodied.
A feature I love about a meal of braised short ribs is that you can make them ahead of the time you want to serve them, which is really nice for the day I’m putting this meal on—the prep work and clean up are minimized. Ribs and the sauce you’ll cook them in can be refrigerated separately for up to 3 days. To serve, heat the sauce and ribs together over medium heat until the ribs are heated through, about 10 minutes.
Finally, now that you’ve been through these instructive braising HOW-TOs, be sure to check out a super 5-STAR recipe in your Cook’n 11—one of Anne Burrell’s (from Food Network). I just entered “braised short ribs” in the Advanced Search feature, and there it was. I’ve tried a couple of the other recipes that popped up (Smitten Kitchen and Simply Recipes), but Anne Burrell’s is my favorite.
- www.ourladyofsecondhelpings.com
- www.mamasminutia.blogspot.com
- www.formerchef.com
- www.foodpostink.com
- www.cookscountry.com
 Alice Osborne
Weekly Newsletter Contributor since 2006
Email the author! alice@dvo.com