
Kitchen Cleaning - Gotta Do It, So Work Smarter, Not Harder!
By Alice Osborne
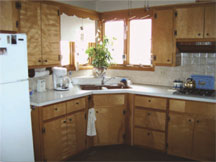 Cleaning the kitchen is one of those not-so-fun but oh-so-necessary chores that we just have to deal with. And a thorough cleaning of the kitchen is always good practice just before all the holiday cooking and entertaining show up.
The good news? There are some things we can do to make the job a little easier - starting with planning. On a very nice website, Happy News, (where you'll find "Happy Living," https://www.happynews.com/living/kitchen-sink/cleaning-kitchen.htm), I found a step-by-step plan to getting the job done simply and well. Here's what author Jody Campbell's general advice is:
 Two cleaning rules-of-thumb for the kitchen: 1) "work top-to-bottom/left shoulder-to-right-shoulder" and 2) "clean as you go."
"Top-to-bottom/left-shoulder-to-right" (or right to left) ensures that you don't skip around and overlook one or more of the areas to clean, or that you don't do something like clean the floor first and then mess it up when you clean the counter tops or appliances.
"Clean as you go" is a great preventative-maintenance measure instilled in employees of many industrial kitchens. Now her specific 9 Steps:
STEP 1: Choose a starting point. As mentioned, a left-shoulder-to-right-shoulder technique can be applied to prevent missing an area of the kitchen. However, while starting with one corner of the kitchen and working your way around clockwise or counterclockwise may help prevent forgetting an area, it also may require extra steps and extra time.
For example, cleaning the kitchen in groups (appliances, counter-tops, cupboards, sink area/dishwasher, trashcan area, and walls and floors), may make more effective use of the cleaning materials and tools needed to do the job. It may make the most sense to clean in groups, but clean from left to right within those groups.
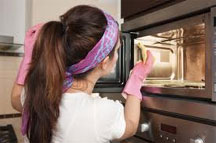 STEP 2: Clean all appliances inside and outside. Refrigerator, freezer, stove top, oven (inside and out), microwave, toaster oven, coffee maker, can opener, and any other kitchen appliance should be thoroughly cleaned. While some of the smaller appliances can be wiped down after each use to help prevent buildup, they should not be overlooked when performing a cleaning overhaul of the kitchen just because they're wiped down from time to time.
Use hot soapy water and sturdy cleaning cloth; then wipe the appliance dry with a towel. If desired, antibacterial sprays and soaps can be applied to surfaces of the appliances. Don't forget the handles of the doors on all appliances.
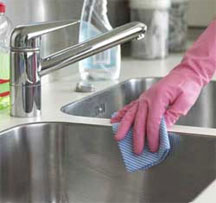 STEP 3: Wash and disinfect the kitchen sink. It should be a focus during every kitchen cleaning, no matter how often preventive maintenance is applied. The surface of the sink basin, edges, faucet, faucet handles (including the sprayer), dish basin and dish strainer (if applicable) should all be washed down thoroughly with a diluted bleach solution or an antibacterial kitchen cleaner.
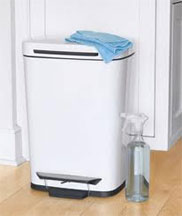 STEP 4: Clean all the wall and floor surfaces around the kitchen trash can. Remove the trash bag and wash the inside and outside of the trashcan with hot soapy water and an antibacterial kitchen cleaner.
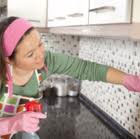
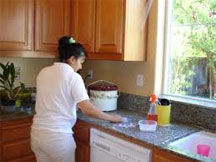 STEP 5: Wash counter tops and backsplashes with hot soapy water and spray with antibacterial spray. Always wipe dry with a clean towel. Spraying the antibacterial cleaner on the surfaces first and allowing it to soak in before washing with hot soapy water is also an effective way to remove dried-on foot particles and other contaminants. Remove all objects on the counter tops. Wash or wipe things thoroughly (including handles) before replacing them to their original location.
I like to empty the contents of my canisters into bowls and put the canisters in my dishwasher along with any washable/waterproof wall decor (my Delft plate collection, for instance). It never ceases to amaze me how much greasy grime ends up on canisters, wall decor, etc. over the months.
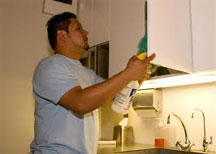 STEP 6: Wipe down cupboard and drawer handles with antibacterial spray or a diluted bleach solution. In fact, don't forget all the other handles in the kitchen that hands continually touch. Wipe down outside cupboard and drawer surfaces. This can be a good time to apply some lemon or other oil to the wood (unless they're painted; then, wiping with a damp cloth is all that's needed). Cleaning inside the cupboard shelves and drawers requires removing the contents. This will not be necessary as often as cleaning other areas, but should be considered at least every few months to prevent weevil infestation. (grrr)
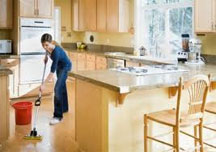 STEP 7: Scrub the kitchen floor last.
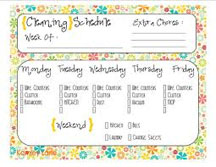 STEP 8: Create an organized cleaning schedule that integrates and prioritizes concentrated areas of the kitchen. As mentioned, interior cupboards and drawers will not need as much attention as kitchen sinks and trashcan areas.
While cleaning spot messes right away (cleaning as you go) is recommended to reduce the effort involved in cleaning, adhering to a cleaning schedule to organize the most important areas of the kitchen to the least important, will ensure your kitchen is safe, clean, and functional.
 STEP 9: Be sure to change the cleaning cloths and towels often, as well as the hot soapy water solution. Using dirty water will not effectively clean the kitchen. (This is where I went, "DUH." But I suspect the reminder is needed.)
 So are you thinking, "Sheesh, this doesn't sound simple OR easy!"? Yup, I agree. BUT, I do think these steps take the disorganized, unnecessary steps out of the deal. Anyway we cut it though, it does need to be done.
So this author's suggestions are a good place to start. By the way, if it were me (and dang, it is), I would be sure dinner was in the crockpot on the day I decide to deep clean the kitchen. If it makes us tired just reading about it, think how tired we'll be doing it - so having dinner ready might be the smartest move of all!
