
For the Bread-Lovers
in the House
By Alice Osborne
 My son and daughter-in-law gave us a great cookbook for Christmas — Artisan Bread in 5 Minutes a Day, by Jeff Jertzberg. M.D. and Zoe Francois. Cookbook reading is such an inspiring pastime, and this book is inspiring for sure.
Before the book even begins, the authors reveal their method of operation. On a page titled “The Secret,” they say:
It is so easy to have freshly baked bread when you want it with only five minutes a day of active effort. First, mix the ingredients from our recipe into a container all at once, and then let them sit for two hours. Now you are ready to shape and bake the bread, or you can refrigerate the dough and use it over the next couple of weeks. Yes, weeks! You’ve prepared enough dough for many loaves. When you want fresh-baked crusty bread, take a piece of the dough from the container and shape it into a loaf. Let it rise for twenty minutes or more and then bake.
So the secret is out: to make artisan bread in 5 minutes a day, always have refrigerated pre-mixed homemade dough on hand. Using the authors’ approach, we don’t have to follow certain steps needed for traditional artisan baking, namely:
 Mix a new batch of dough every time we want to make bread
”Proof” yeast
Knead dough
Cover formed loaves
Rest and rise the loaves in a draft-free location—it no longer matters!
Fuss over doubling or tripling of dough volume
Punch down and re-rise the dough
Poke rising loaves to be sure they’ve “proofed” by leaving indentations
OK, just this much reading and I was convinced. If you like this idea as well, here is a recipe from the book that you might try. Let me know what you think—we ought to compare notes. I think learning to make great homemade bread, easily and quickly, is a super goal for 2011, don’t you?
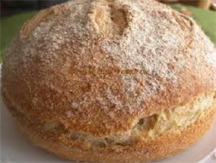
European Peasant Bread
Makes four 1-lb loaves. Recipe is easily doubled or halved.
 3 C lukewarm water
1 ½ Tbsp yeast (2 packets)
1 ½ Tbsp Kosher salt
½ C rye flour
½ C whole wheat flour
5 ½ C unbleached all-purpose flour
Cornmeal for the pizza peel
Mix and store the dough: Mix the yeast and salt with the water in a 5-qt bowl, or a lidded (not airtight) food container. Mix in remaining dry ingredients without kneading, using a spoon, a 14 C capacity food processor (with dough attachment), or a heavy-duty stand mixer (with dough hook). If you’re not using a machine, you may need to use wet hands to incorporate the last bit of flour.
Cover (not airtight), and allow to rest at room temperature until the dough rises and collapses (or flattens on top), approximately 2 hours.
The dough can be used immediately after the initial rise, though it is easier to handle when cold. Refrigerate in a lidded (not airtight) container and use over the next 14 days.
On baking day: Dust the surface of the refrigerated dough with flour and cut off a 1-lb (grapefruit size) piece. Dust with more flour and quickly shape it into a ball by stretching the surface of the dough around to the bottom on all four sides, rotating the ball a quarter-turn as you go. Allow to rest and rise on a cornmeal-covered pizza peel for 40 minutes.
Twenty minutes before baking time, preheat the oven to 450 degrees, with a pizza stone placed on the middle rack. Place an empty broiler tray on any other shelf that won’t interfere with the rising bread. Sprinkle the loaf liberally with flour and slash a cross, “scallop,” or tic-tac-toe pattern into the top, using a serrated bread knife. Leave the flour in place for baking; tap some of it off before slicing.
Slide the loaf directly onto the hot stone. Pour 1 C of hot tap water into the broiler tray, and quickly close the oven door. Bake for about 35 minutes, or until the top crust is deeply browned and very firm. Smaller or larger loaves will require adjustments in baking time. Allow to cool before slicing. Finally, one quick tip the authors call “The Scoop-and-Sweep Method:”
This technique gives consistent results without sifting or weighing. It’s easier to scoop and sweep if you store your flour in a bin rather than the bag it’s sold in; it can be hard to get the measuring cups in a bag without making a mess. Also: Don’t use an extra-large 2-cup-capacity measuring cup, which allows the flour to over-pack and measures too much flour.


Contribute to the Cook'n Club!
DVO would love to publish your article, prose, photography and art as well as your cooking, kitchen and nutrition tips, tricks and secrets. Visit the Newsletter Submission / Win Win for All section in our Forum for more information and details.