Easy Ice Cream Cake That is Better Than DQ’s!
One thing I remember about going to birthday parties in the summertime as a kid was that you knew it was a super, EXTRA great party if the kid was lucky enough to have gotten an ice cream cake from Dairy Queen for their cake! They were always a big hit and admittedly I was always pretty envious of the kids that got them :) They are pretty expensive and have always seemed a bit intimidating to me to try and make one at home but after reading through several recipes, especially the one I’m going to share here today, they can be extremely easy to make and are {dare I say even more} delicious than the store bought ones! Get ready for this to be the most requested birthday cake from your family members from now on. You have officially been warned--once you go here, you might not ever be able to go back!
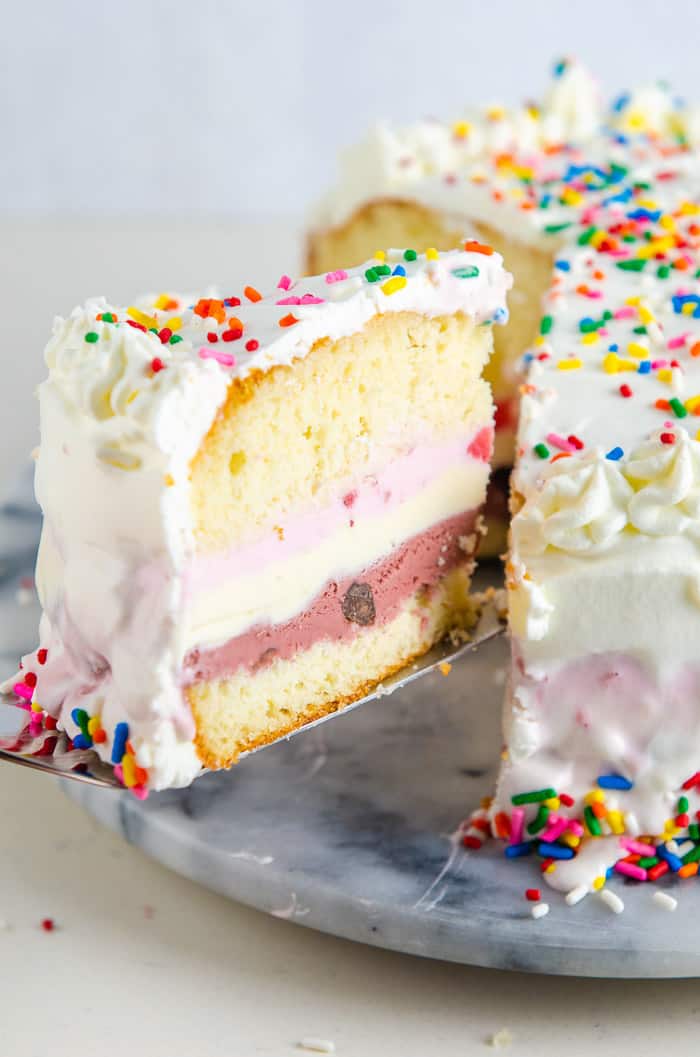
Today I’m going to share a recipe for a cookies and cream ice cream cake with a chocolate cake layer. One thing that is great about making these yourself is that you can customize them to be exactly what flavors you would want. You could mix up the flavors like using Vanilla cake and chocolate ice cream (I highly recommend the Private Selection Chocolate Ganache ice cream--it is the best plain chocolate ice cream ever! You can find it at your local Kroger store), or strawberry ice cream and funfetti cake, red velvet cake and cheesecake ice cream, etc. I even think something citrusy sounds fun like some kind of lemon or vanilla cake with orange sherbert instead of ice cream. That would taste so fresh and light!
This cookies and cream ice cream cake recipe I am sharing today is super easy with boxed cake mix, store-bought ice cream and CoolWhip for the icing. It is really easy and much more cost-effective to make at home. An 8-inch Dairy Queen Ice cream cake costs $22.99, so you can make this cake for at least half the cost!
If you want to make it more from scratch, I highly recommend looking at the ice cream cake recipes from sugargeekshow.com. She has a really cute red, white and blue one for the Fourth of July that you could make this year if you want with vanilla cakes made from scratch, colored red and blue, with vanilla ice cream. It is covered in a stabilized whipped cream (you add a little bit of gelatin so it stays stable for longer), and she put red and blue sprinkles on the side with whipped cream, strawberries and blueberries on the top. It is so adorable and I’m sure it tastes delicious. It would be a real show-stopping dessert for your Fourth of July party.
Here are a few tips and questions you might have when making an ice cream cake:
What kind of frosting should I use?
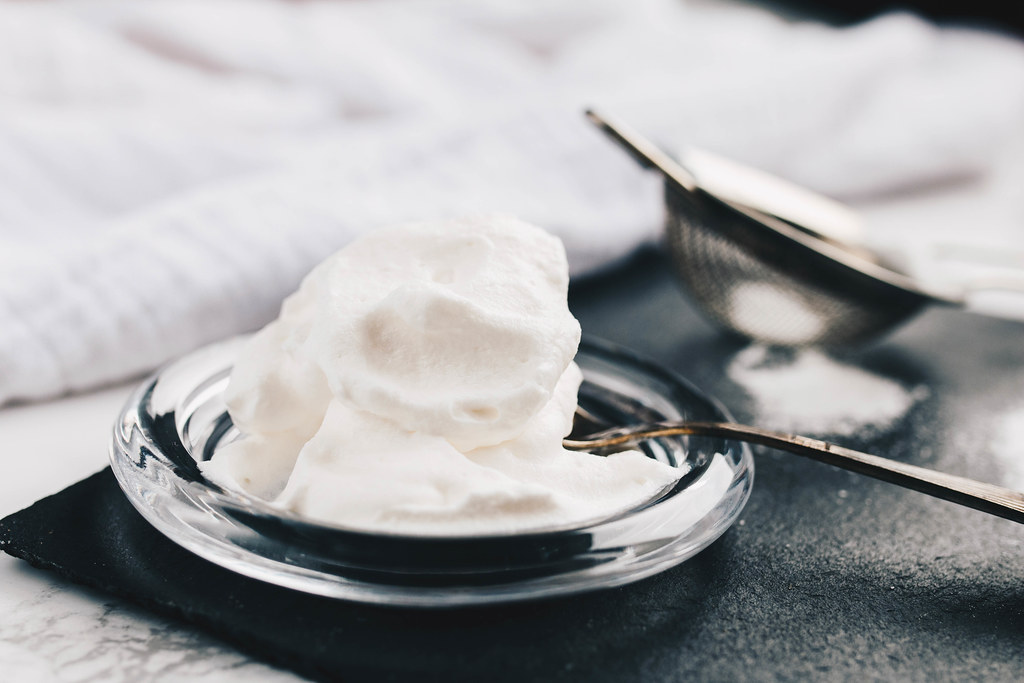
You will want to use either stabilized whipped cream made from scratch, or another type of whipped cream topping, such as CoolWhip because it has the same consistency as ice cream and will come to room temperature at the same time. Whereas, if you use buttercream frosting, the butter stays very hard even as the ice cream melts.
How do you cut an ice cream cake?
Take it out of the freezer and keep it on the counter or in the fridge 30 minutes before you want to serve it. Use a knife dipped in hot water before slicing.
How do you keep your ice cream cake from melting?
Work quickly when assembling your cake. Make sure your frosting is ready to go before you get out your frozen layers of cake and ice cream. Make sure you have enough room in your freezer for your finished cake before starting! You don’t want to it be melting away as you dig around to make room for it after it is all the way ready.
Use a minimum of 8” round cake pan for ice cream cakes.
Ice cream cakes don’t do as well if they are tall and skinny, so make sure you are using at least an 8” cake pan.
How much ice cream do I need?
1.75 quarts of ice cream is the perfect amount to fill a round 8-inch cake pan to the top. (1.5 quarts should do just fine too.)
How to keep cake moist when freezing.
Get your cake out of the oven and let it cool in pan for 10-15 minutes, then flip it out of the cake pan onto a cooling rack. Wait about 10 more minutes, and while it is still warm, wrap tightly in plastic wrap and freeze. The still warm cake will allow the moisture to stay within the cake and won’t become dried out while stored in the freezer.
What is the best way to make the ice cream layer?
You can either use plastic wrap, foil or even parchment paper to line your cake pan you will be filling with ice cream. Let it sit out for a few minutes to soften before you add all of the ice cream to your pan. Press into the pan and smooth it out with a spatula. Cover and freeze for at least 6 hours before assembling the ice cream cake.
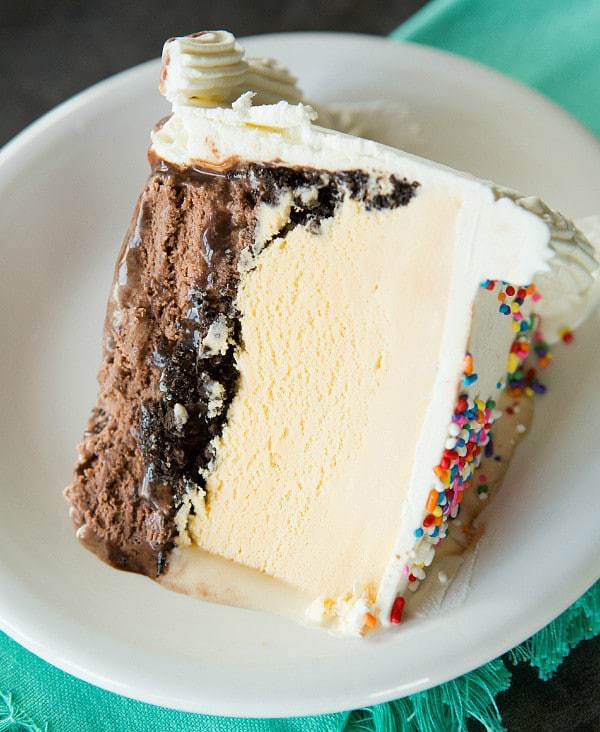
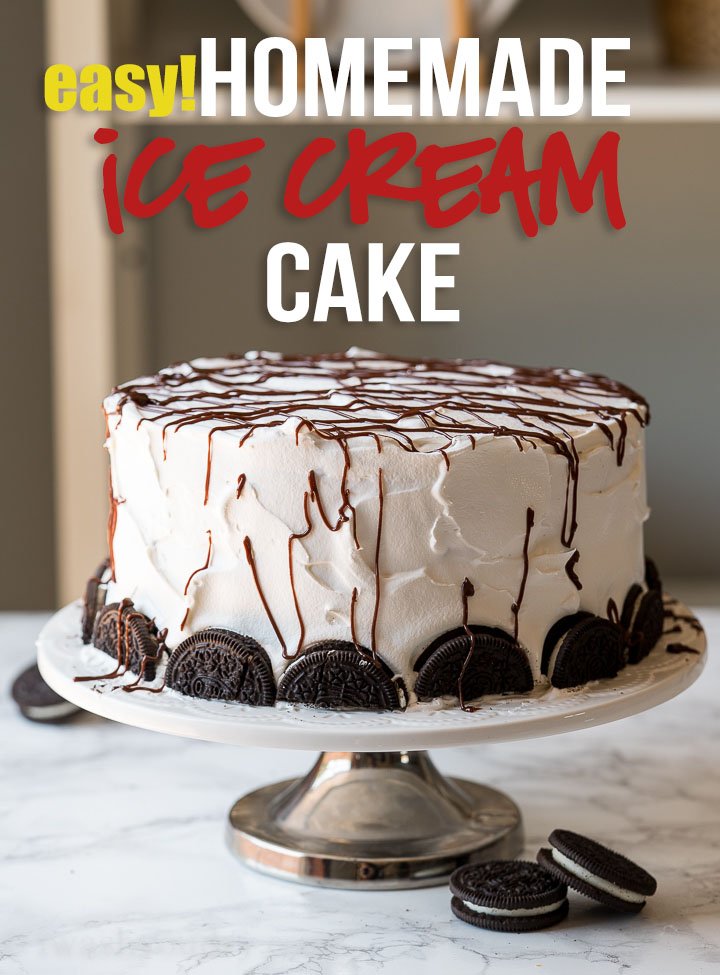
Without further ado, here is the recipe I love from IWashYouDry.com for super easy and delicious Oreo ice cream cake with a nice fudgy, crunchy Oreo layer in the middle, which is authentic to the iconic Dairy Queen ice cream cake.
Have you made your own ice cream cake at home? What is your favorite flavor? Please feel free to share any tips or thoughts in the comments below.
1 cake mix, prepared into two round cakes
1.5 quarts ice cream, softened
1/2 cup hot fudge sauce , room temperature
16 Oreo cookies
8 ounces whipped topping, thawed
Directions:
Add Recipe to Cook'n
blog comments powered by Disqus
Today I’m going to share a recipe for a cookies and cream ice cream cake with a chocolate cake layer. One thing that is great about making these yourself is that you can customize them to be exactly what flavors you would want. You could mix up the flavors like using Vanilla cake and chocolate ice cream (I highly recommend the Private Selection Chocolate Ganache ice cream--it is the best plain chocolate ice cream ever! You can find it at your local Kroger store), or strawberry ice cream and funfetti cake, red velvet cake and cheesecake ice cream, etc. I even think something citrusy sounds fun like some kind of lemon or vanilla cake with orange sherbert instead of ice cream. That would taste so fresh and light!
This cookies and cream ice cream cake recipe I am sharing today is super easy with boxed cake mix, store-bought ice cream and CoolWhip for the icing. It is really easy and much more cost-effective to make at home. An 8-inch Dairy Queen Ice cream cake costs $22.99, so you can make this cake for at least half the cost!
If you want to make it more from scratch, I highly recommend looking at the ice cream cake recipes from sugargeekshow.com. She has a really cute red, white and blue one for the Fourth of July that you could make this year if you want with vanilla cakes made from scratch, colored red and blue, with vanilla ice cream. It is covered in a stabilized whipped cream (you add a little bit of gelatin so it stays stable for longer), and she put red and blue sprinkles on the side with whipped cream, strawberries and blueberries on the top. It is so adorable and I’m sure it tastes delicious. It would be a real show-stopping dessert for your Fourth of July party.
Here are a few tips and questions you might have when making an ice cream cake:
What kind of frosting should I use?
You will want to use either stabilized whipped cream made from scratch, or another type of whipped cream topping, such as CoolWhip because it has the same consistency as ice cream and will come to room temperature at the same time. Whereas, if you use buttercream frosting, the butter stays very hard even as the ice cream melts.
How do you cut an ice cream cake?
Take it out of the freezer and keep it on the counter or in the fridge 30 minutes before you want to serve it. Use a knife dipped in hot water before slicing.
How do you keep your ice cream cake from melting?
Work quickly when assembling your cake. Make sure your frosting is ready to go before you get out your frozen layers of cake and ice cream. Make sure you have enough room in your freezer for your finished cake before starting! You don’t want to it be melting away as you dig around to make room for it after it is all the way ready.
Use a minimum of 8” round cake pan for ice cream cakes.
Ice cream cakes don’t do as well if they are tall and skinny, so make sure you are using at least an 8” cake pan.
How much ice cream do I need?
1.75 quarts of ice cream is the perfect amount to fill a round 8-inch cake pan to the top. (1.5 quarts should do just fine too.)
How to keep cake moist when freezing.
Get your cake out of the oven and let it cool in pan for 10-15 minutes, then flip it out of the cake pan onto a cooling rack. Wait about 10 more minutes, and while it is still warm, wrap tightly in plastic wrap and freeze. The still warm cake will allow the moisture to stay within the cake and won’t become dried out while stored in the freezer.
What is the best way to make the ice cream layer?
You can either use plastic wrap, foil or even parchment paper to line your cake pan you will be filling with ice cream. Let it sit out for a few minutes to soften before you add all of the ice cream to your pan. Press into the pan and smooth it out with a spatula. Cover and freeze for at least 6 hours before assembling the ice cream cake.
Without further ado, here is the recipe I love from IWashYouDry.com for super easy and delicious Oreo ice cream cake with a nice fudgy, crunchy Oreo layer in the middle, which is authentic to the iconic Dairy Queen ice cream cake.
Have you made your own ice cream cake at home? What is your favorite flavor? Please feel free to share any tips or thoughts in the comments below.
Homemade Oreo Ice Cream Cake
This super easy Homemade Oreo Ice Cream Cake is better than store bought and the perfect birthday party cake!
Serving size: 4
Calories per serving: 983
Ingredients:
Calories per serving: 983
1 cake mix, prepared into two round cakes
1.5 quarts ice cream, softened
1/2 cup hot fudge sauce , room temperature
16 Oreo cookies
8 ounces whipped topping, thawed
Directions:
1.Prepare the devil's food cake mix into two 8-inch round cake pans, let cool completely. Wrap with plastic wrap and place each layer in a large zip-close bag and place in the freezer. You'll save one for later and use one for this recipe.
2.Using the same size cake pan that you baked the cake in, line it with plastic wrap or parchment paper and place the softened ice cream in it and spread into an even layer. Top with plastic wrap and place back in the freezer until set.
3.Just before assembling the cake combine 10 finely chopped Oreo cookies and ALL BUT 1 tbsp of the hot fudge sauce in a bowl.
4.Place one layer of the chocolate cake on your cake stand (or large plate) and spread the hot fudge cookie mixture over the top in an even layer. Carefully place the ice cream layer on top and frost the cake with the thawed whipped topping.
5.Decorate the sides and top with the remaining cookies and hot fudge sauce. Place back in the freezer until set. Just before serving take the cake out and let sit at room temperature for 10 to 15 minutes for easy slicing. Enjoy!
Notes:
This recipe makes two layers of chocolate cake, but only one will be used. Keep the other wrapped tightly in plastic and stored in the freezer for up to 5 months.
Source: iwashyoudry.com
Recipe formatted with the Cook'n Recipe Software from DVO Enterprises.
Sources:
- www.aclassictwist.com
- www.sugargeekshow.com
- www.browneyedbaker.com
- www.iwashyoudry.com
- www.flickr.com
 Mary Richardson
Weekly Newsletter Contributor since 2014
Email the author! mary@dvo.com