
|
|
|

|
|
Volume II
|
September 3, 2010
|
|
|

|
Can It! Canning for Newbies
By Camille Rhoades
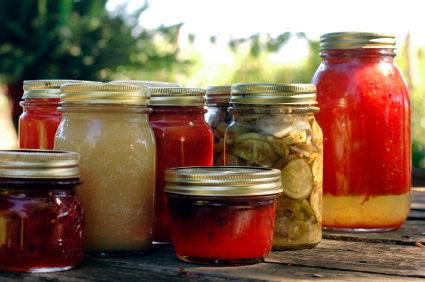
I cant remember a time when my mom didnt have a storage room full of home canned peaches, tomatoes, or salsa. I remember long days with her and her sister in the kitchen talking, laughing, and canning and the results of those days were to be enjoyed by our family for months to come.
Some of the produce was grown in our garden and some was purchased during sales at the grocery store. Regardless of where it came from Mom would buy it when it was peak season so she could get low prices and high quantities and then work her magic so we could enjoy it all year.
 This year my mom called all four of her daughters and asked us if we would like to get together for a canning day. To explain a little, my sisters and I cover the gambit when it comes to cooking and homemaking skills. One of my older sisters is often referred to (some may call it teased) as Becky Home-ecky because there is nothing she cant figure out how to do, make, or create and she always has some ambitious project up her sleeve. Another sister really doesnt cook anything that didnt come in a package already prepared! The other two of us fall somewhere along that long spectrum.
Of course Becky Home-ecky has canned before and has all the needed supplies and was eager to jump in on the activity. For the rest of us it was a little more intimidating, but we decided that with Mom at the helm it is something we all want to learn and enjoy together.
The following information helps explain the whos, whats, and whys of canning for newbies!
Why Can?
There are many reasons why you and your family may choose to can and preserve your own food or can food you have purchased. These are just a few.
Canning saves you money.
It is eco-friendly.
Canning cuts down on waste.
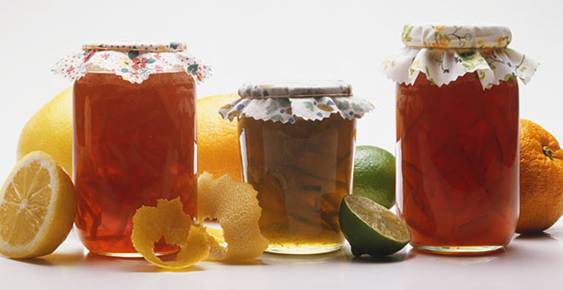
Its fresher and tastes better.
No BPA or additives.
What You Need to Get Started
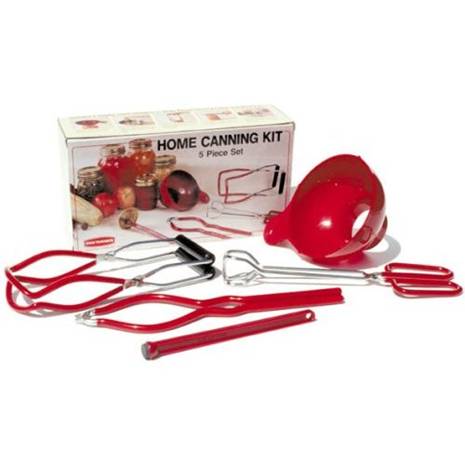 Canning Jars and Seals use mason-style jars with sealed lids and rings, which can be found at most grocery stores Canning Jars and Seals use mason-style jars with sealed lids and rings, which can be found at most grocery stores
Wide-Mouth Funnel makes filling jars with sauces or jams easier and less messy
Lid Wand for easy removal of lids and rings from boiling water
Ladle for filling jars
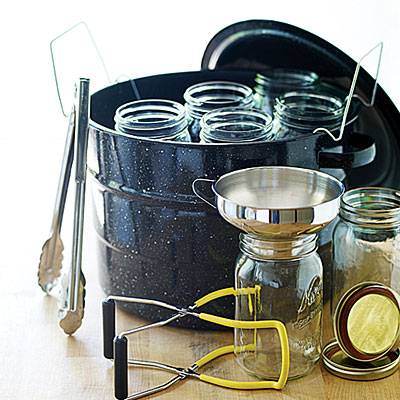
Large Pot for boiling canned preserves and jams, fruits, tomatoes and pickled vegetables
Pressure Canner used for canning vegetables and meats because it has the ability to reach a higher temperature
Tongs of Jar Lifters rubberized lifters make removing cans from their water bath less slippery, but a good pair of tongs can work just as well
Clean Cloths used to wipe down jars, lids and rims of jars
The Process of Preserving
 1. Start by sterilizing your jars. 1. Start by sterilizing your jars.
Wash your lids and jars in hot soapy water. Then move them to a boiling water bath for ten minutes to sterilize. Remove jars from the water bath, but leave the lids in the hot water until youre ready to use them to ensure they dont come in contact with anything before you seal your jars.
2. Slice, dice, pickle and pour.
It is best to can your fruits and vegetables immediately after you harvest them for the highest vitamin and nutrient concentration. The longer a fresh piece of produce sits, the more vitamins it loses. Prepare fruits and vegetables by slicing and dicing, prepare your jams and preserves using your favorite recipes, and pickle vegetables before placing in the jars.
Tomatoes should have lemon juice or another citric acid added to them prior to canning to ensure their pH level is above 4.6, and ascorbic acid solutions can be added to fruits to prevent browning prior to placing in jars.
Iron, aluminum and copper should not be used when preparing your fruits and vegetables to can. These metals can cause discoloration of the produce.
3. Fill your jars.
There are a few things to remember when filling your jars. First, be sure not to fill them completely. Produce expands during the boiling process, so leaving adequate space at the top prevents the jar from leaking and making a mess.
After filling your jar with produce, unless canning jams, jellies and preserves, youll be pouring liquid to submerge the fruit or vegetables. Pour the boiling water, pickling solution or juice to cover up to the top of your produce.
Make sure there are no air bubbles along the sides of the jar and that the produce is submerged in the liquid. Wipe the rims of the jars down with a clean cloth and cap with the flat sealing lids and rims.
4. Process your jars.
Preheat water in your pot or pressure cooker. For hot produce, water should be preheated to 180º F, and for cold produce, it should be around 140º F. This will help prevent the jars from cracking when they are placed in the pot.
Water should be an inch or two above the top of the canning jar when they are placed in the pot for a water boiling process. Use a pressure canner according to the manufacturers directions to determine the amount of water needed in the bottom prior to adding the jars.
Add the jars using your tongs or jar lifter, and place them in the vessel so they are not touching. Place the lid on your pot or pressure canner. With water bath canning, bring the water to a slow boil and then start your timer to process for the length of time dictated by which vegetable youre canning and the altitude at which you live. For pressure cooking, youll want to check for the length and temperature needed for your region as well.
5. Remove your jars and let them cool.
Place your jars on a flat wood or cloth-covered solid surface to let them cool. Let them sit for a day to completely cool. While cooling, your jars will start to pop, creating the vacuum seal.
After they have cooled, press down on the center of your jars to ensure they have sealed completely. Any lids that spring back have not sealed and can be placed in the refrigerator and eaten first.
6. Label and store your preserved food.
Label your jars with the contents and the date. You can write directly on the lid with a Sharpie or print or purchase specialty labels for your jars.
Once you have them labeled and have wiped off any food pieces or water from the outside of the jar, store your food in a dark, dry place until youre ready to enjoy.
Join the Cook'n Club!
An unbeatable value with exclusive benefits for members only.
Enjoy articles like this and many other benefits when you join the Cook'n Club.
|
|
|