Try This Idea for Your Child’s Next Birthday Party
I just wanted to let you guys know about the most FUN girl birthday party I hosted recently for my daughter’s 11th birthday. It was so much fun for all the girls and so much fun to witness all the joy, laughs and creativity that were involved.
My daughter loves to bake and everytime we go to the mall we see this little baking shop that hosts birthday parties, company parties, etc. where they teach you how to decorate cakes. My daughter LOVED the idea of doing that for her birthday, but when I looked into it, it costs over $700 dollars for a party with 6 girls to do this! I couldn’t believe it, and knew that we could pull it off with even more pizazz, for a FRACTION of the cost. And I’m so happy to report that we did! A month later, the girls are still telling my daughter how much fun they had at her party, so I wanted to tell you some details about it in case you would be interested in doing something similar.
Here are a few things we did to pull off this cake decorating party:
1. Get Your Baking Supplies.
3. Get Your Cake Toppings and Decorations.
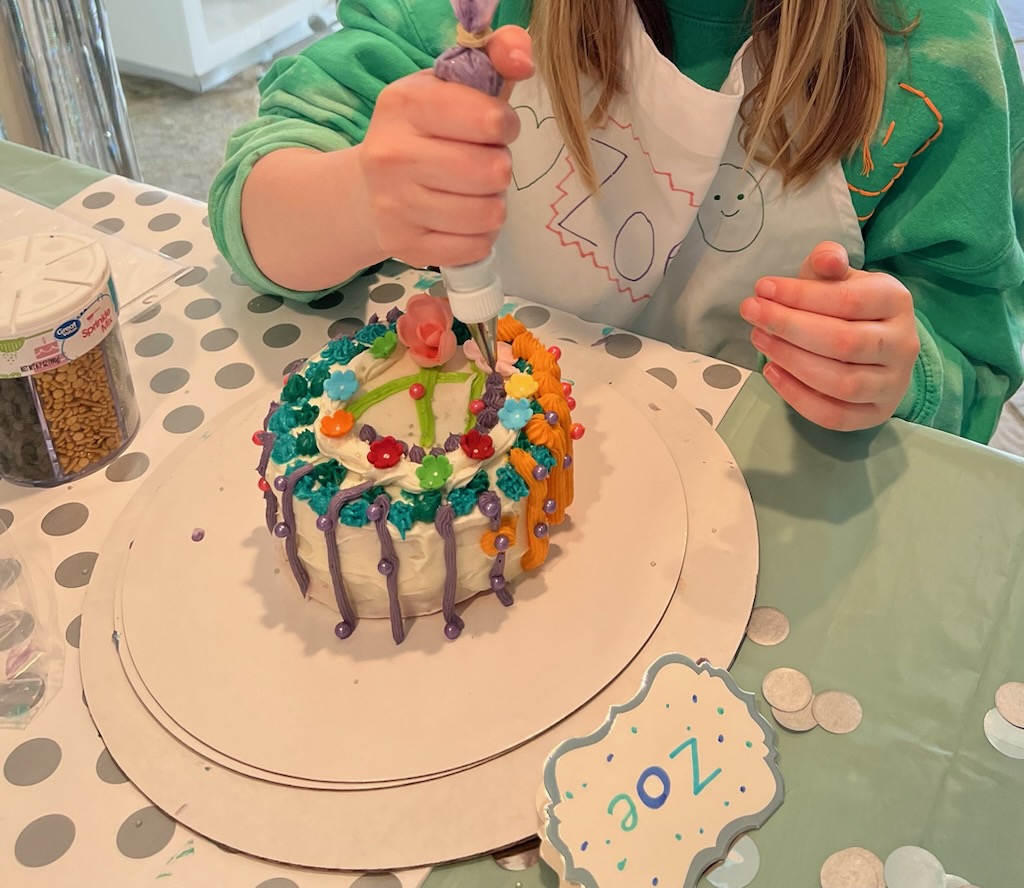
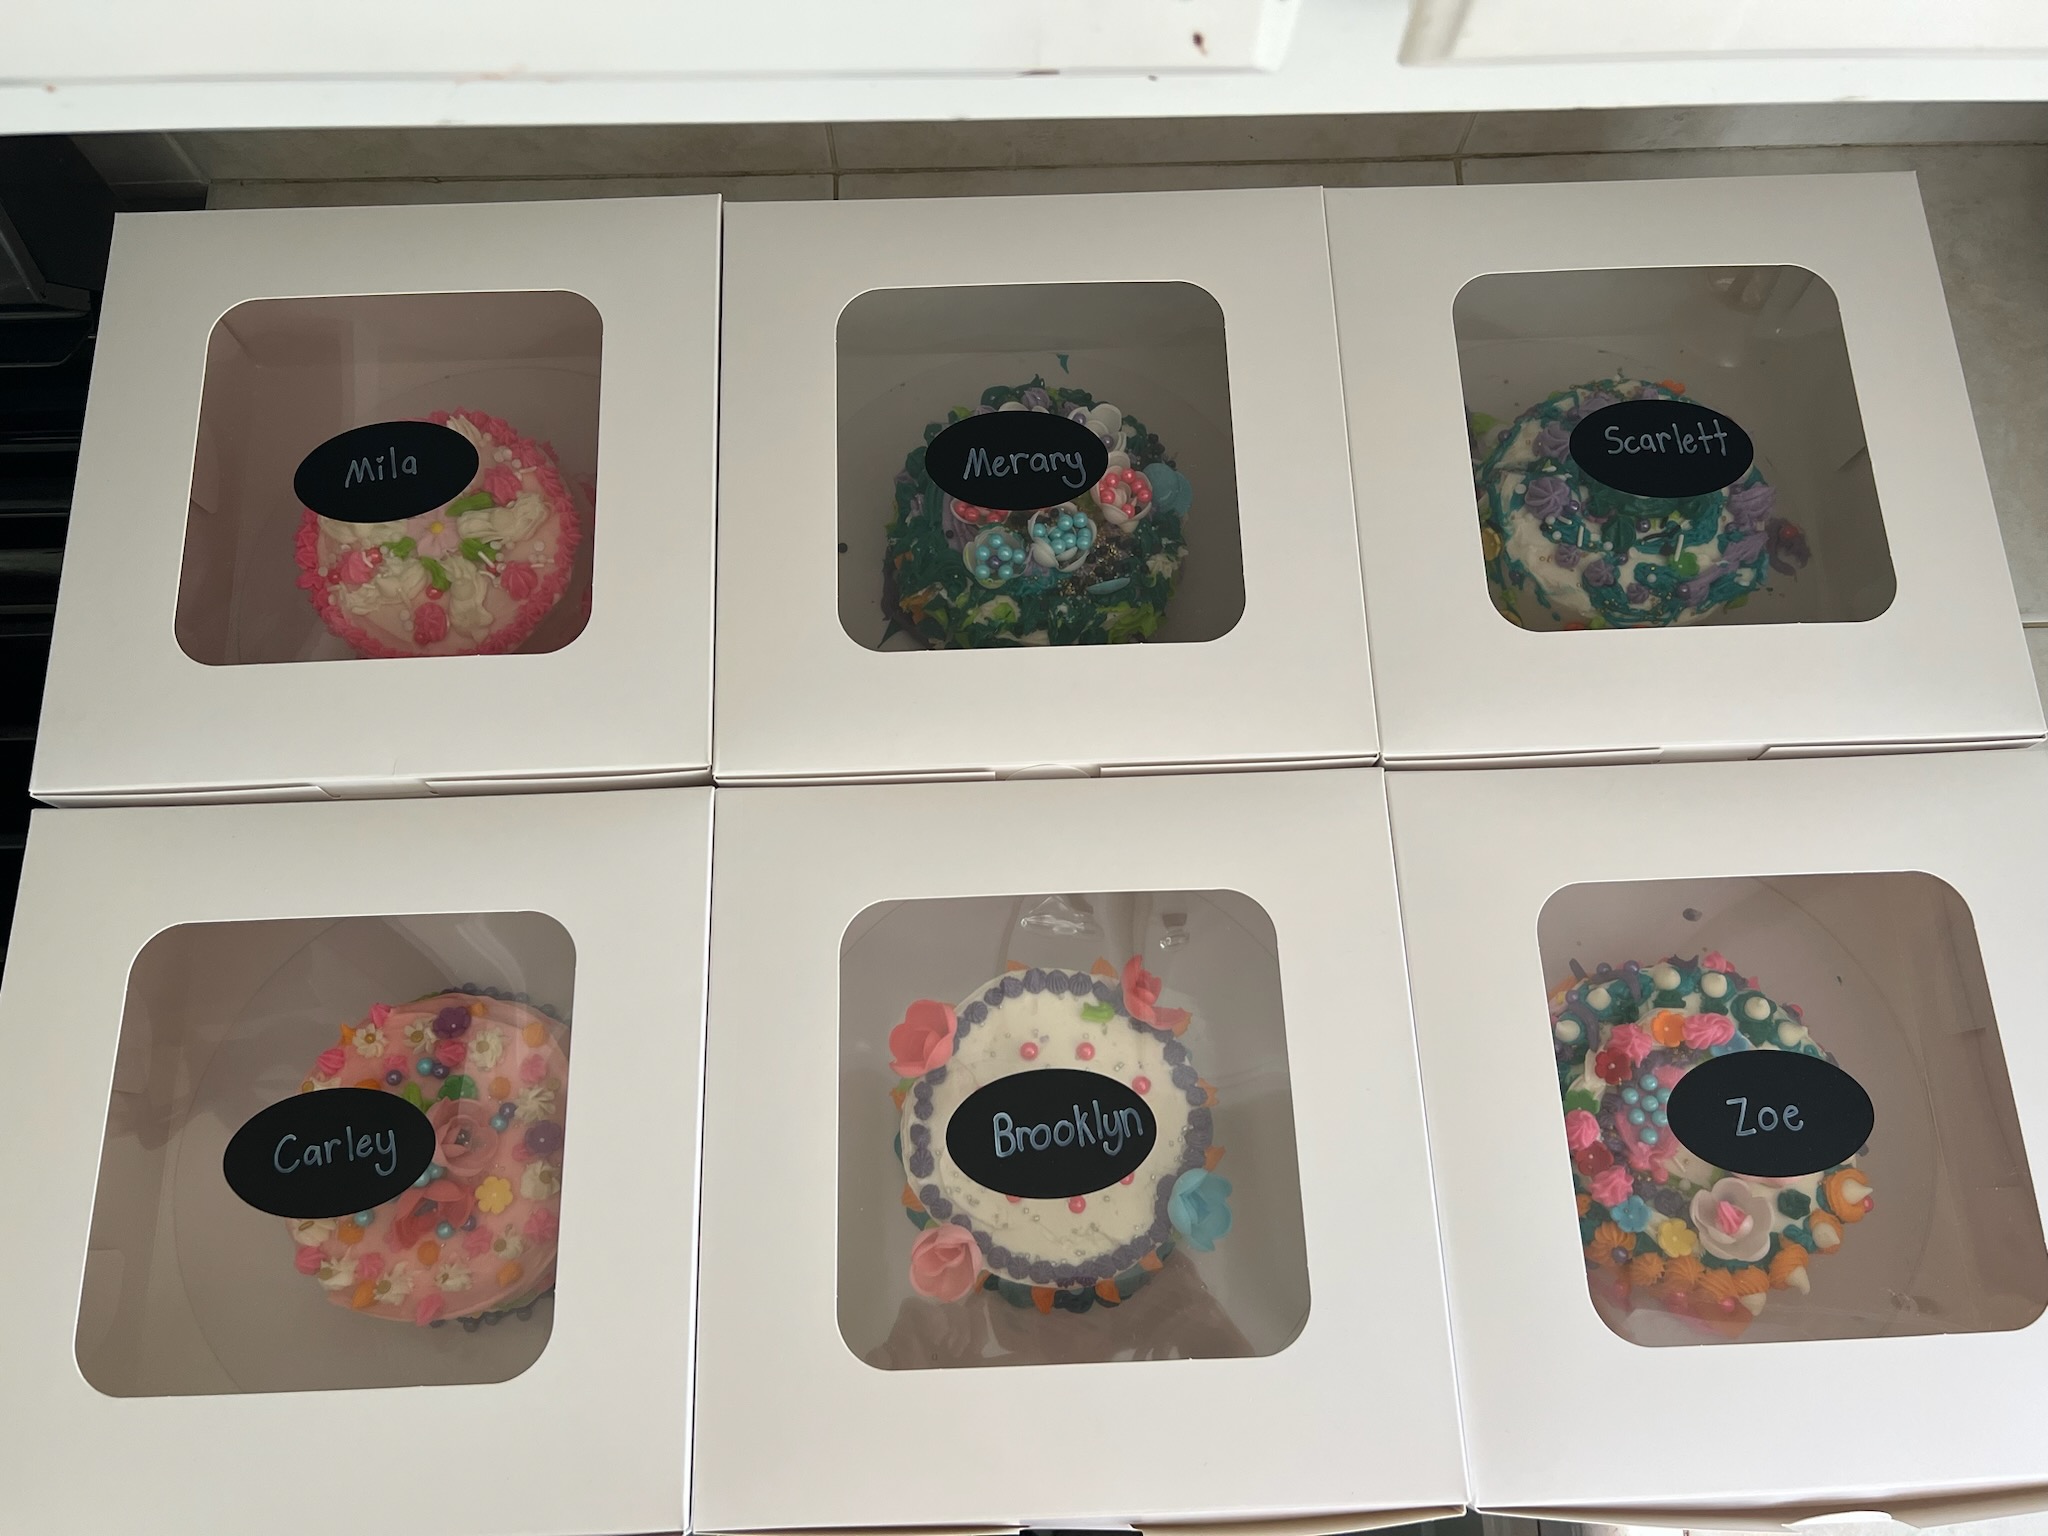
The party started at 11:00 am, so the morning of, I pulled the cakes out of the freezer and frosted them with a layer of white buttercream, and set them inside their cake box with their name on it so they knew where they were going to sit. I also thought it would be fun to get each girl an apron and chef’s hat, and I got those for really cheap on Amazon as well. My daughter decorated and wrote each girl’s name on their apron and really enjoyed doing that. This is definitely optional though, and would cut down on the cost of the party if you decided to skip those.
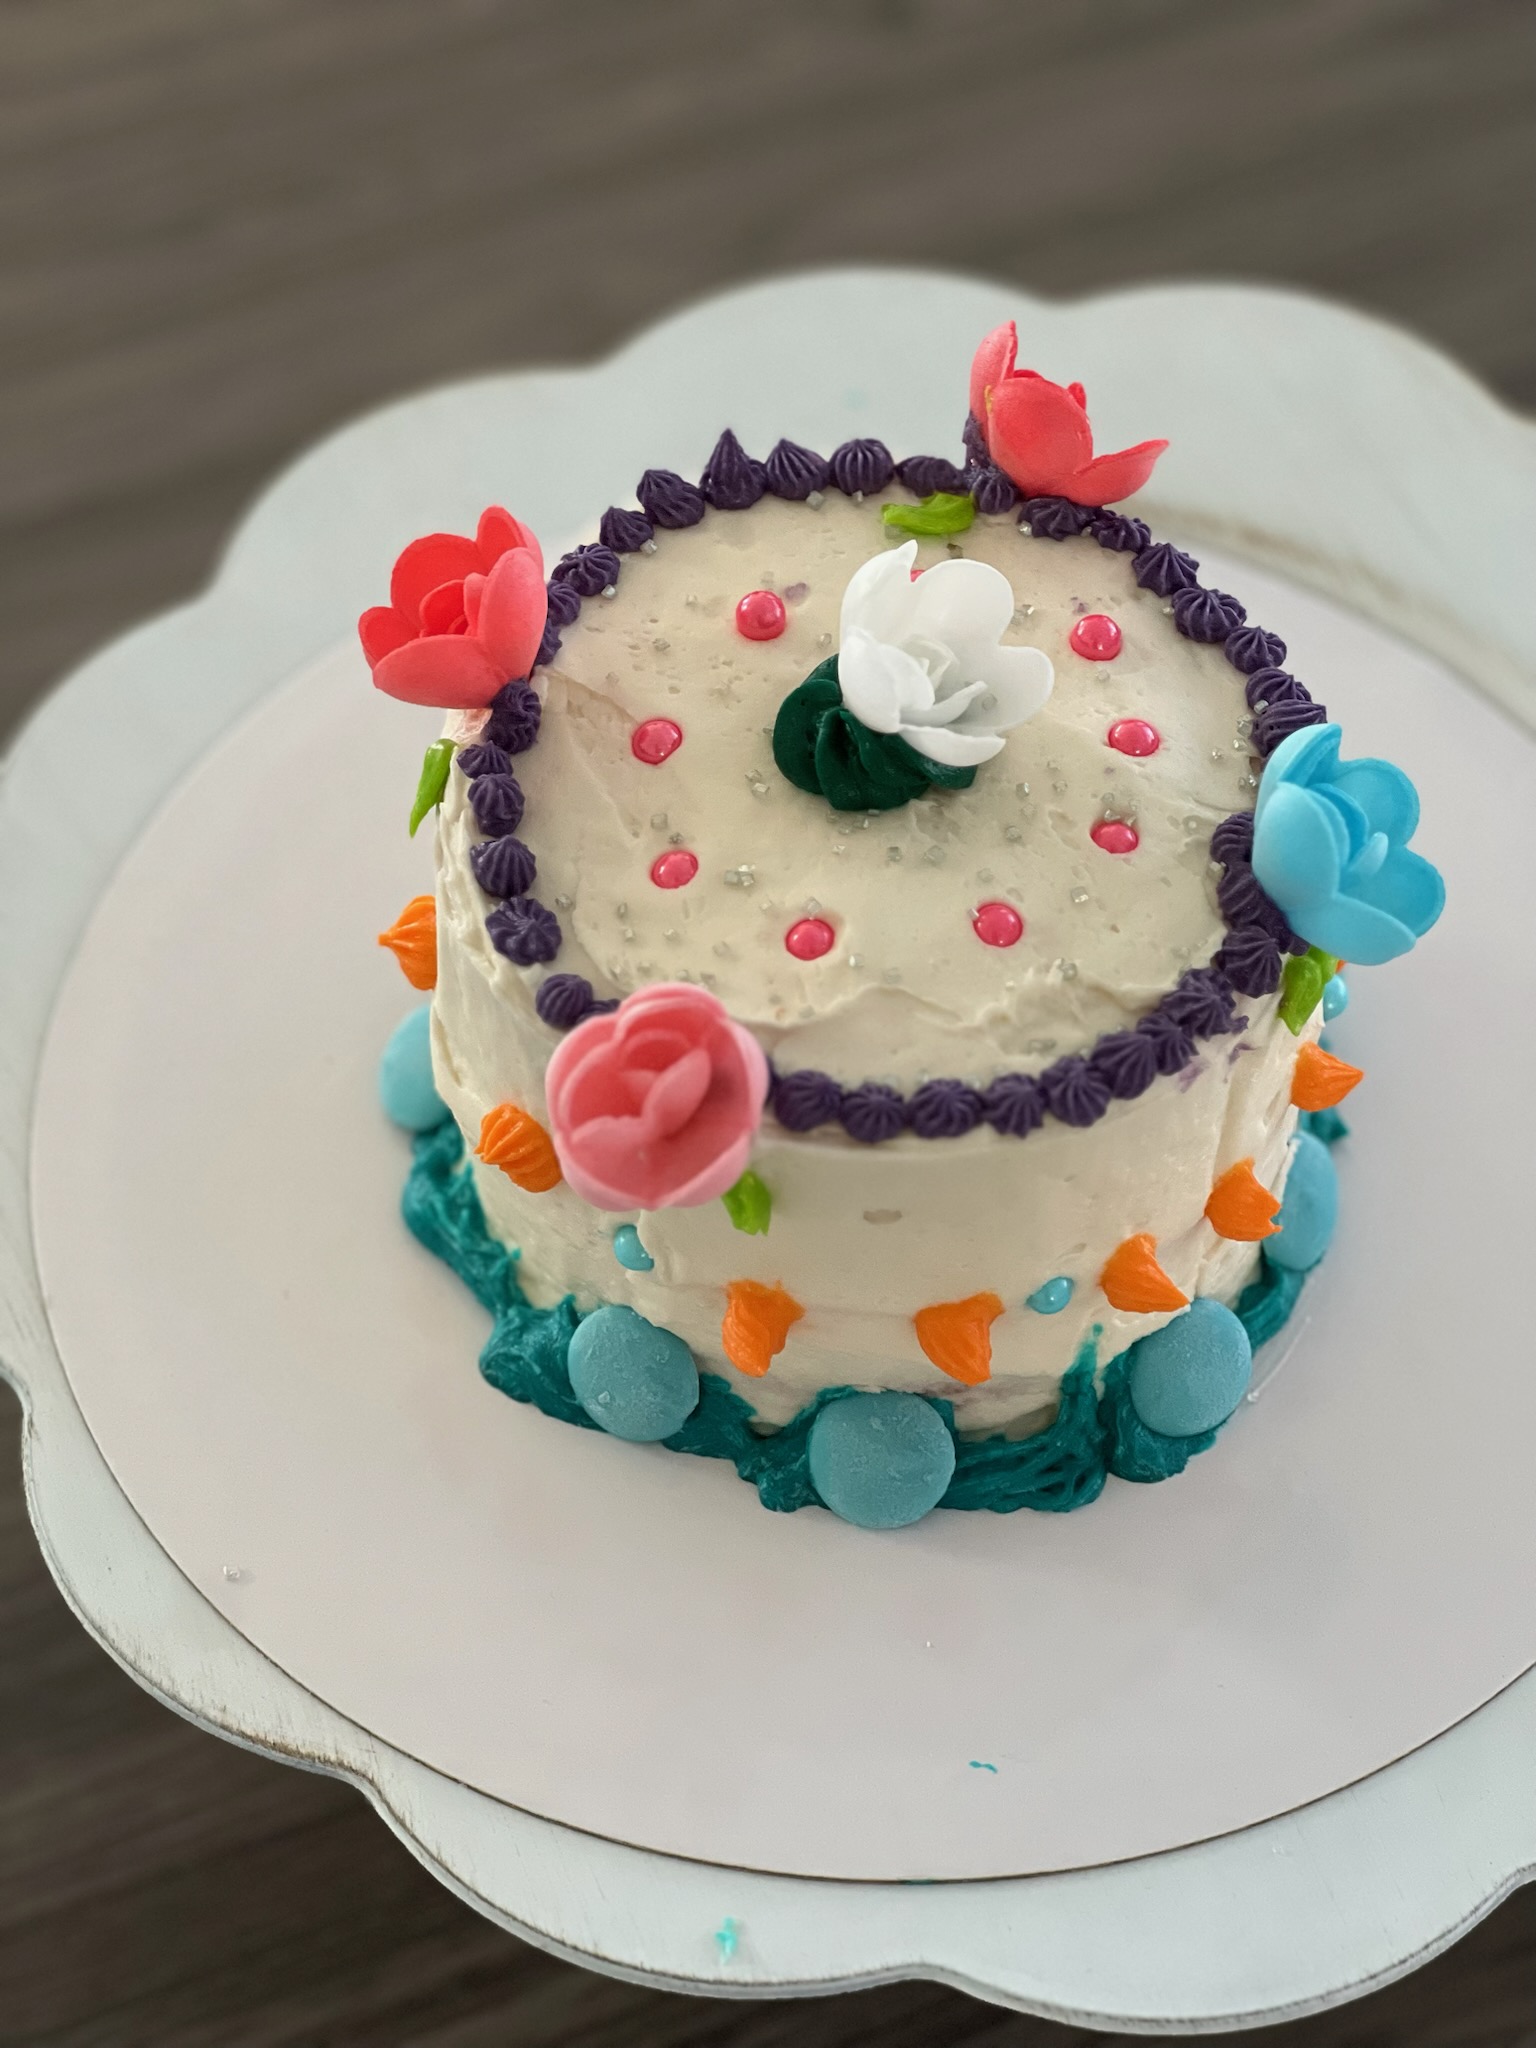
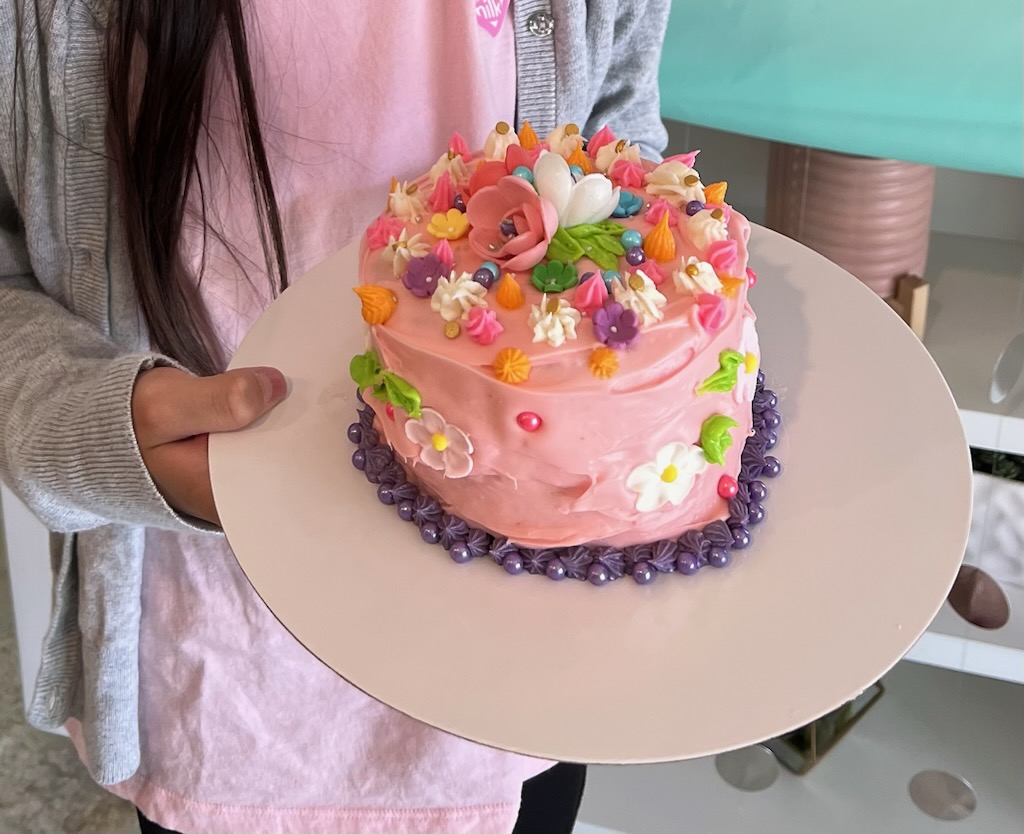
This was honestly such a fun party for my daughter and I to bond over and get ready for together. It was so astounding to me how different every girl’s cake was. Some were very pretty and precise, while others looked like a fun, colorful decorations explosion ha. The party itself was such a hit, but so was all the preparations we did together to get ready. I would highly recommend doing this for a birthday party, or even if you are looking for a fun activity to do with a group of girlfriends. It is a fun (and delicious) way to dive into your creativity.
My daughter loves to bake and everytime we go to the mall we see this little baking shop that hosts birthday parties, company parties, etc. where they teach you how to decorate cakes. My daughter LOVED the idea of doing that for her birthday, but when I looked into it, it costs over $700 dollars for a party with 6 girls to do this! I couldn’t believe it, and knew that we could pull it off with even more pizazz, for a FRACTION of the cost. And I’m so happy to report that we did! A month later, the girls are still telling my daughter how much fun they had at her party, so I wanted to tell you some details about it in case you would be interested in doing something similar.
Here are a few things we did to pull off this cake decorating party:
1. Get Your Baking Supplies.
- Cake Rounds and Boxes: We had each of the girls bring home their cake in a bakery box, and we made 5” cakes, so I bought 10” cake boxes and 10” cardboard cake rounds, and those dimensions were perfect for our cute little cakes they decorated.
- 5” cake pans: I did a two-layer cake for each child and used 5” cake pans I ordered from Amazon. I think 6” would be a great size too, if you already have that.
- To save yourself some time, I made the cakes slowly and easily over the course of a few days before the party and froze them until the morning of the party. I just bought cheap store-bought cake mixes and a few cans of store-bought frosting to use as the layer in between cakes. You can usually find these frostings and cake mixes at your local dollar store.
- I did make a big batch of white vanilla buttercream for the outside of the cake, because I like how smooth it can look and it tastes so much better than canned frosting :)
- I froze the cakes by wrapping them tightly first in clear Saran wrap, followed by tin foil.
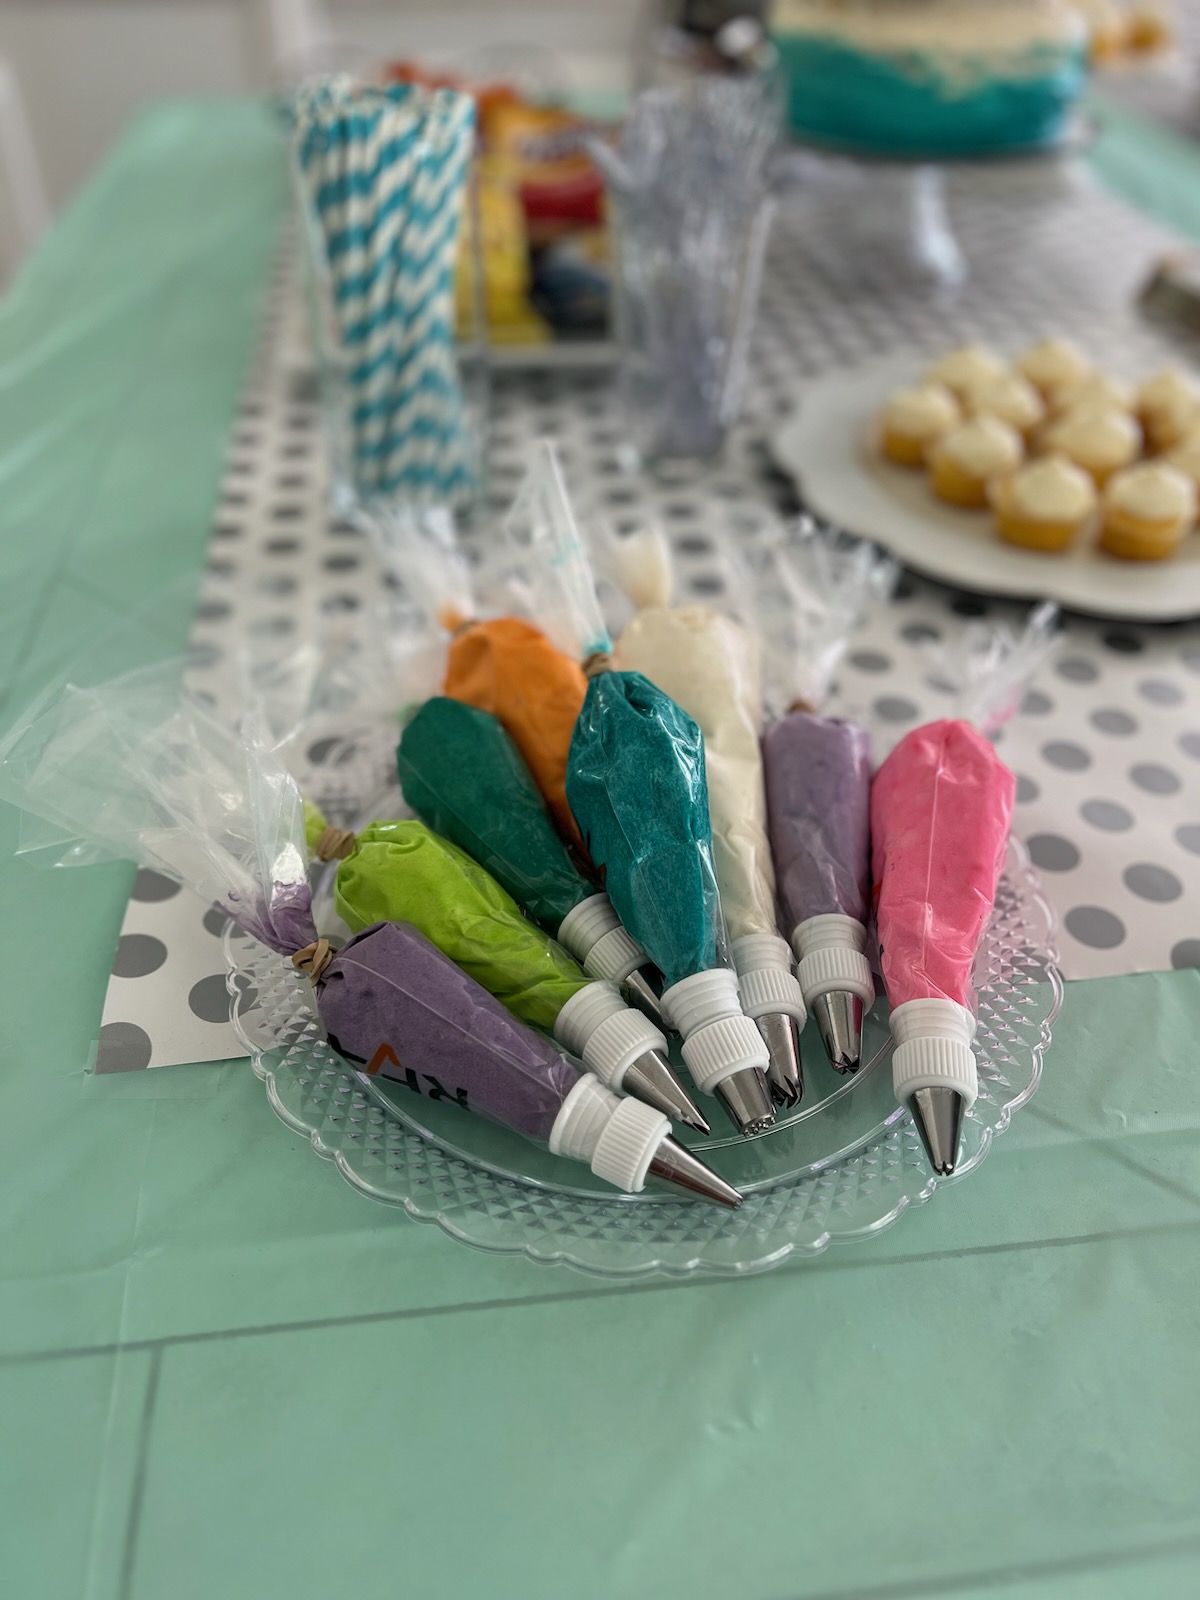
3. Get Your Cake Toppings and Decorations.
- I got several kinds of little edible flowers from both Hobby Lobby and Walmart. I’m sure you could find them easily on Amazon too.
- I set out little bowls filled with the edible flowers, colorful sprinkles, and the colorful sixlets candies with some fun, bright colors.
- I also put several colors of buttercream frosting in piping bags with different tips on them.
- The cheapest place I found to get some of the decorations was probably Hobby Lobby and they have a TON of stuff in their cake decorating section. You can also check Walmart or Amazon for all of this stuff as well.
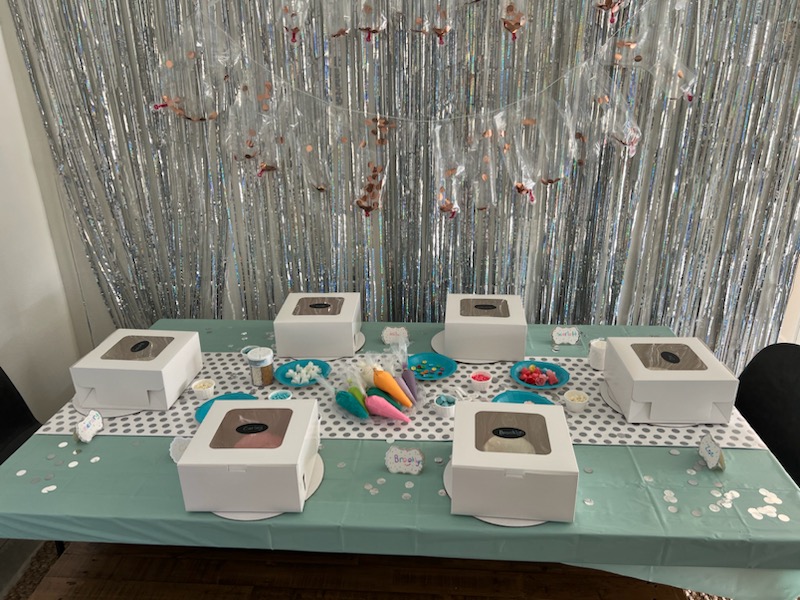
The party started at 11:00 am, so the morning of, I pulled the cakes out of the freezer and frosted them with a layer of white buttercream, and set them inside their cake box with their name on it so they knew where they were going to sit. I also thought it would be fun to get each girl an apron and chef’s hat, and I got those for really cheap on Amazon as well. My daughter decorated and wrote each girl’s name on their apron and really enjoyed doing that. This is definitely optional though, and would cut down on the cost of the party if you decided to skip those.
This was honestly such a fun party for my daughter and I to bond over and get ready for together. It was so astounding to me how different every girl’s cake was. Some were very pretty and precise, while others looked like a fun, colorful decorations explosion ha. The party itself was such a hit, but so was all the preparations we did together to get ready. I would highly recommend doing this for a birthday party, or even if you are looking for a fun activity to do with a group of girlfriends. It is a fun (and delicious) way to dive into your creativity.
 Mary Richardson
Weekly Newsletter Contributor since 2014
Email the author! mary@dvo.com