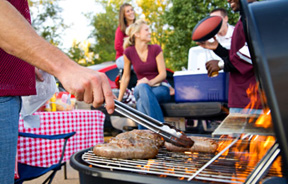
It's hard to believe that it is bar-b-que time again! We love the smell of grilled foods that seem to circle our neighborhoods each week-end. However, if you are like us, our grills may need a little TLC before they are ready for the first marinated steak or chicken to hit. These great ideas are from Right@Home.
Rules of Thumb
Not all grills are created equal. Always read your owner's manual for specific guidelines and cleaning instructions. Most are available online at the grill manufacturers website.
Clean after each use. No matter what type of grill you have, routine post-use cleaning is the key to maintaining it. Clean grills work better, last longer and won't leave a bad taste on food (from excess smoke caused by buildup). This is especially true for cooking grates, which, if left dirty, can harbor bacteria that could contaminate food.
 Keep it hot.
 The best time to clean a grill is right after food is removed, because the cooler you allow your grill to get, the more time you're giving stuck-on food and grease to harden. Heat makes it easier to remove food particles, so get at it while its hot.
Use protection. After each use, place a grill cover over your cleaned, cooled grill, and if possible, store in a sheltered area. This is especially important during the off season to help prevent mechanical failures, rusting and dirt buildup.
Keep up appearances. After each use, remove dirt and grease from the outside of your grill with an antibacterial cleaner or heavy duty cleaner. If unsure about the finish on your grill, spot-test in an inconspicuous area first. If you notice rust spots or areas where the paint is coming off, use grill-safe paint (available at hardware stores) for exterior touch-ups.
Cleaning Your Grill
 Cooking grates.
 Clean them after each use and again lightly before using again. Here's how to do it quickly and easily:
Step 1: If your grill has cooled, close the top (if you have one) and turn up the heat for about 5 to 10 minutes.
Step 2: Use the back end of a stiff wire brush (see sidebar) to scrape off cooked-on remains.
Step 3: Use the brush side to remove all remaining particles and grease.
Step 4: Put out the flame and allow grill to cool.
Step 5: Coat grates with cooking spray or a paper towel and cooking oil to prevent future buildup.
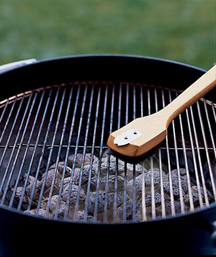
Charcoal grills. Though generally low maintenance, ashes make charcoal grills more inclined to rust. After each use, and after the grill has fully cooled, remove grates and clear your ash catcher; or remove ashes using a garden trowel or large spoon. Then use your wire brush to sweep out any remains.
Extend the longevity of your grill with a thorough preseason cleaning. Remove each detachable piece, and clean individual parts with warm, soapy water and a wire brush. Let cooking grates soak for 15 to 30 minutes before scrubbing. Heat grill completely (for 15 minutes or so) to burn off any remaining soap residue before using.
Propane or gas grills. These grills sometimes have a misleading clean knob or a self-clean setting, but these settings will burn off only some stuck-on food. If your grill does have a setting like this, use it to preheat before cleaning grates as detailed above.
Regularly, though not necessarily after every use, lift the grate and gently clean the barriers above the burners (the barriers could be ceramic briquettes, lava rocks or metal plates). If ceramic or rock, use a soft cloth, because these surfaces are more delicate than metal. Use your wire brush to clean metal plates.
The Emergency Deep Clean. To remove baked-on food or grease, tightly wrap cooking grates (covering them entirely) with heavy-duty aluminum foilshiny side outand place on a heated grill for 15 to 30 minutes, depending on severity. Let the grates cool; then unwrap the foil. If that doesn't do the trick completely, follow up with a wire brush (see side bar) and warm, soapy water.