
|
TOP SELLERS

Cook'n with Betty Crocker $29.95 
Cook'n Download $79.95

NEWSLETTERS
• NEW Cook'n Club Weekly• Current Issue • HomeCook'n Archive CONTACT US
• Contact Info 
|
|
|
||||

|
|
|||

|
|
Tip and Tricks for 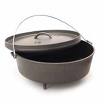 Coal Placement for Baking
The "plus 4, minus 4" rule is a good starting point for charcoal distribution when baking. This means the size of the Dutch oven (the number usually appears on the lid) plus 4 charcoals for the top heat and the size of the Dutch oven minus 4 for bottom heat. Example: 12-inch Dutch oven + 4 = 16 briquettes for top heat and 12-inch - 4 = 8 for bottom heat. Bottom charcoal placement for all ovens (except the 16-inch) should be a circular pattern placed just inside the bottom edge of the pot and evenly spaced. For the lid, evenly space most of the charcoal around the rim with a smaller circular pattern around the handle. Rotate the oven clockwise a quarter of a turn every 10-15 minutes and the lid counter clockwise. This will produce even heating. For bottom heat, avoid placing charcoal directly in the center. Heat from outside briquettes radiates inward, eliminating the need for a center briquette. The one exception to this rule is the 16-inch Dutch oven. Because it is so large, a checkerboard pattern underneath seems to work best. Still be sure to rotate the oven. It's okay to rearrange your charcoal if necessary. If you find a place not raising evenly or browning as it should, move some heat to it. If there is a hot spot, rotate the oven and rearrange the heat. Coal Placement for Roasting For roasting with charcoal us the same number of briquettes on both top and bottom of the oven as the size of the oven. Example: On a 12-inch Dutch oven, use 12 briquettes on top and 12 on bottom. Other Important Tips for Success There are many other tools that can be purchased to make some tasks a little easier, but that is really up to the cook. If you are happy with tongs, gloves, and pliers then by all means keep using those. If you are looking for more tools there are things like lid lifters and coal starters that make nice additions for simple cooking. Beyond all other tips, just ENJOY! Dutch oven cooking is one of the most fun ways to get out and experience cooking outside of the kitchen. It can be done just about anywhere and with as many people as you want to invite. These little tips will help you get well on your way to a fun outdoor meal. calli@dvo.com If you have any additional tips that you'd like to add, please post them on the Cook'n Club Forum (if you're a Cook'n Club Member)...or e-mail them to Dan@dvo.com. Join the Cook'n Club! An unbeatable value with exclusive benefits for members only. Enjoy articles like this and many other benefits when you join the Cook'n Club.
OTHER GREAT ARTICLES
• Campfire Cuisine • Dutch Oven Desserts • Remedies for Your Dutch Oven • Why Women Live Longer Than Men • HomeCook'n Cover Page
|


