I'm convinced that the easier it is to work in the kitchen (to get a meal on the table), the more inclined we are to do so, and the more effort we are inclined to put into it as well.
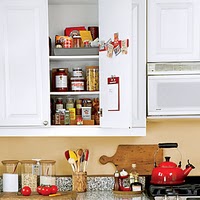
This said, you'll do yourself a huge favor if you'll take a little time to create a user-friendly environment--get the clutter out, give your spaces specific assignments, and make sure your tools and equipment are clean and up to par. Then make a list of items you need to replace, so your meal prep is more pleasant.
I dislike using (or even looking at) things that aren't pretty, so I got rid of some ratty-tatty pot holders and other things that were sub-par. Go through your drawers and cupboards and consider doing the same--rout out anything you don't like, use, need, want, or have room for. Keep only those things that are in working order and pretty to look at.
With that foundation laid, then incorporate habits that make day-to-day kitchen work smoother and easier. For instance:
1) Tuck your butter stick wrappers into a small zip-lock bag and keep in the fridge; when you need to grease a baking pan,
just pull one of these already-greased papers out and grease away.
2) Remove your brick of cream cheese from its wrapper and store the cheese in a 1 C lidded container. While this keeps the cheese fresher longer, it also saves you some time when needing to use it--no hassling with the unwrapping and rewrapping of that annoying foil wrapper.
These two tips may seem inconsequential in and of themselves, but when you cluster time-saving habits together, you end up saving a LOT of time and energy over the long run.
And here's one more simple and brilliant time-saver:
3) Make (and always have on hand) "
gravels. When you have frozen pre-cooked ground beef, sausage, grated cheeses, etc., you essentially have dinner! For example: I'd been at work all day yesterday, and when I got into the kitchen at 5:45 pm, I needed some way to get a dinner prepped in 15 min. I had a package of hamburger "gravel" in the freezer, so I was able to put an "Impossible Cheeseburger Pie" (thank you, Bisquick!) together in less than 10 min. Baking time was 30 min., so we were able to sit down to dinner by 6:30 pm.
Do you remember the "Impossible..." recipes Bisquick put out several years ago (Impossible Cheeseburger Pie, Impossible Spinach Pie, Impossible Lasagne Pie, Impossible Taco Pie, etc.)? Well, when you've got "gravels" and biscuit mix on hand, all things dinner are absolutely possible in no time flat! And again, please share your tips and recipes with us (you can leave them in the comment box and I'll include them in the next post). Meanwhile, give this cheeseburger pie a try, and until next time, happy cookn!
Impossible Cheeseburger Pie
(Serves 6-8)

1 lb ground beef ("gravel", remember "gravel")
1 1/2 C chopped onion ("gravel", remember "gravel")
1 1/2 C milk
3/4 C biscuit baking mix (this is a Bisquick recipe, so they hope you'll use theirs)
3 eggs
1/2 tsp salt
1/2 tsp pepper
2 tomatoes, sliced
1 C shredded Cheddar cheese ("gravel", remember "gravel")
1 C shredded Paremsan cheese (doesn't have to be fresh--dried is fine), divided
Preheat oven to 400 degrees. Grease a 10x1 1/2 inch pie plate. If you aren't using "gravels" (shame on you), then cook and stir beef and onion over medium heat until beef is brown; drain. Spread in pie plate. Beat milk, biscuit mix, eggs, salt and pepper, and 1/2 C Parmesan cheese until smooth, 15 sec. in blender on high or 1 min. with had beater. Pour over beef and onion. Bake 25 min. Remove from oven and top with tomato slices; sprinkle with Cheddar Cheese and remaining 1/2 C Parmesan cheese. Bake another 5 min. or until knife inserted in center comes out clean. Cool 3-4 min. before serving. VERY good!
 Download this recipe.
Contribute to the Cook'n Club!
DVO would love to publish your article, prose, photography and art as well as your cooking, kitchen and nutrition tips, tricks and secrets. Visit the Newsletter Submission / Win Win for All section in our Forum for more information and details.