
|
TOP SELLERS

Cook'n with Betty Crocker $29.95 
Cook'n Download $79.95

NEWSLETTERS
• NEW Cook'n Club Weekly• Current Issue • HomeCook'n Archive CONTACT US
• Contact Info 
|
|
|
||||

|
|
|||

|
|
Deck The Halls
The phrase From The Kitchen doesnt have to mean something you plan to eat. There are lots of fun décor and ornament ideas out there that can really spruce up your home and make lovely little gifts for those you love, all made by you in your wonderful kitchen. Here are four ideas for ornaments that will deck the halls and warm the hearts of all your friends and family!
Stained Glass Candy Ornaments 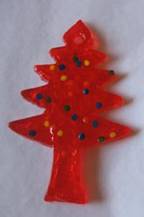 What You Need: What You Need:What You Do: 1. Preheat the oven to 350 degrees. 2. Help your child generously spray the cookie cutters with nonstick spray. 3. Help your child wrap the cookie cutters tightly with aluminum foil, leaving the top side uncovered. Place the wrapped cookie cutters on the baking sheet, uncovered side up. 4. Have your child place candies into the cookie cutters in a single layer. 5. Put the cookie cutters in the oven and let them cook for approximately 8-10 minutes or until the candy is fully melted. Let the candy shapes cool for 4 minutes so they harden slightly. 6. Once the candy has cooled slightly, create a hole in each candy shape by inserting the tapered end of the chopstick into each one where you want the ribbon to go. 7. Let the candy shapes cool completely. Once cool and hard, carefully remove the candy shapes from the cookie cutter and foil. 8. Have your child thread a ribbon through the hole in the ornaments. Now your "glass" ornaments are ready for hanging! Place them on the Christmas tree, hang them in a window, or suspend them from the ceiling for a breathtaking holiday display. Gingerbread Ornaments What would Christmas be without this classic? 3 T shortening 1/2 c sugar 1/2 c molasses 1 t baking soda 3/4 c water 3 1/2 c flour 1 t of cloves, ginger and cinnamon Preheat oven to 350 degrees. Beat shortening and sugar together until light and fluffy, stir in molasses. Sift the dry ingredients together. Stir them into shortening mixture in 3 parts alternating with a 1/4 cup of water each time. Dough will be stiff. Refrigerate overnight. Cut dough into 3 pieces. Knead to warm dough slightly, then roll each piece out about 1/4 inch thick. Cut cookie out with a gingerbread pattern of your choice Use a drinking straw to punch hole in center if ornament will be hanging. Place cookies on cookie sheet and bake 20 minutes, turn oven off and let cool in oven. Remove from cookie sheet and place on rack to dry for about 3 days to totally harden. These cookies are purely for decorative purposes and not to be eaten. If you wish you can seal cookies with 3 coats of clear acrylic and decorate with colorful acrylic paints when dry. Cinnamon Ornaments Cinnamon Dough Ornaments are easy to make. They'll add a homemade touch to your Christmas tree and the spicy aroma of cinnamon to a room. You can paint and decorate them with cinnamon hearts, cloves, raisins, etc. but they also look nice with no enhancements, just a thin red or green ribbon for hanging. In addition to being cute tree ornaments, they can be used in other ways - Add them to a Christmas wreath, using a hot melt glue gun. Personalize them and use in place of gift tags on extra special presents. Hang one or two cinnamon dough ornaments from a ribbon on a mason jar filled with candy, potpourri, homemade apple butter, jam or gift in a jar mixes. Cinnamon dough ornaments are strictly for decorations and crafts. They are not for eating. Here's the directions for making them ... Cinnamon Dough Ornaments  3/4 cup applesauce - canned works best here. 3/4 cup applesauce - canned works best here. 1 cup cinnamon 1 T. ground cloves (optional) extra cinnamon for rolling the dough. ribbon or yarn for hanging. Preparation - Mix applesauce with cinnamon to form a stiff but rollable dough. Adjust these amounts depending on the consistency of the applesaauce used. Roll to about 1/4 inch thickness. Use extra cinnamon for rolling the dough, as you would normally use flour. Cut with cookie cutters. Use a drinking straw to make a hole at the top of each one for hanging. To Dry - Place ornaments on a wire rack for 3 to 4 days, turning a few times each day for even drying. Decorate with acrylic craft paint if desired. String a piece of thin ribbon or yarn through the hole for hanging. Salt Dough Ornaments are fun to make. Paint them with acrylic paint, then add a few coats of clear spray for colorful, long lasting, keepsake ornaments. Salt Dough Ornaments  1 1/4 cups boiling water 1 1/4 cups boiling water1 cup salt 4 cups flour Pour the boiling water over the salt and stir. Allow to cool, then add the flour. Mix well, forming a ball. Knead until the dough is soft and workable. Roll the dough on a floured surface. Cut with your favorite cookie cutters into desired shapes. Make a hole in the top of each one for hanging. A thin drinking straw works well for this. Place the cut out dough on a cookie sheet lined with foil. Bake at 175º for 2 hours or until the dough becomes hard. When thoroughly cooled and dry, paint and decorate the ornaments with acrylic craft paint. After the paint is dry, wait 24 hours, then spray with 2 or 3 coats of clear acrylic paint. Allowing complete drying between coats. Tie a small piece of ribbon or yarn through the hole for hanging. Salt dough ornaments are strictly for decorations and crafts. They are NOT for eating. As you can tell, some of these are edible and some are not! That being said, if you have a dog or young children, hang all ornaments made with food well above the height where they could possibly reach them. This holiday season cook up some treats that will last all season and warm the hearts of those you love every time they see them! If you have any additional tips that you'd like to add, please post them on the Cook'n Club Forum (if you're a Cook'n Club Member)...or e-mail them to Dan@dvo.com. Join the Cook'n Club! An unbeatable value with exclusive benefits for members only. Enjoy articles like this and many other benefits when you join the Cook'n Club.
OTHER GREAT ARTICLES
• Extraordinary Ways to Say... • Gifts that Keep Giving • Puttin' on The Ritz • Life In The New Millennium • HomeCook'n Cover Page
|


