
|
|
|

|
| Volume II |
October 31, 2003
|
|
|

COOKIE TYPES, TIPS, AND TRICKS Desiri Wightman, RD
|
Bar cookies: Potluck staples, bar cookies are the easiest of all cookies to bake; simply whip up the batter, spread in the pan, bake all at once, and cut into individual servings. Their texture crosses all ranges, sometimes chewy, sometimes crisp, and sometimes cake-like. For most bars, it is best to cut them into squares just before serving. That way, they'll hold their shape and arrive at picnics with little crumbling. The info below will help you estimate what size pan you'll need to feed your individual army.
 8-inch square pan = 20-25 bars 8-inch square pan = 20-25 bars
11x7-inch rectangular pan = 22-32 bars
9-inch square pan = 24-32 bars
13x9-inch rectangular pan = 30-40 bars
15x10-inch jelly roll pan = 23-48 bars
Raisin Bars
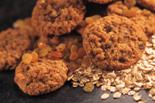
 Drop cookies: Second only to bars on the easy scale, drop cookies are shaped by dropping a blob of dough onto baking sheets. Common favorites include chocolate chip, oatmeal raisin, and those yummy cake-like cookies. Drop cookies: Second only to bars on the easy scale, drop cookies are shaped by dropping a blob of dough onto baking sheets. Common favorites include chocolate chip, oatmeal raisin, and those yummy cake-like cookies.
When a recipe states, "drop by rounded teaspoon," it means to use about 1-1/2 teaspoons of dough if you measured it precisely. When it suggests using 1 heaping teaspoon, you'd be using 2 teaspoons of measured dough. If you need a precise amount of cookies, you may wish to measure out "a pattern" of dough by using actual measuring spoons. Drop the measured dough onto your baking sheet to use it as a visual reference of how much dough you need. Then go ahead and use an eating teaspoon, scoop out the approximate amount of dough, and push it from the spoon onto the cookie sheet with another spoon.
Pumpkin Waffle Drops
 Hand-shaped Cookies: A little more time-consuming, a lot more impressive! Your hands become the "cookie-cutters" in these sweet treats, shaping mounds of dough into pretzels, crescents, balls, cups, ropes . . . really any shape desired. Jam thumbprints, fortune cookies, and snickerdoodles are just a few of the cookies that hands work to shape. Try to handle the dough as little as possible to prevent tough cookies. Remember, you want to eat them, not fight them. Hand-shaped Cookies: A little more time-consuming, a lot more impressive! Your hands become the "cookie-cutters" in these sweet treats, shaping mounds of dough into pretzels, crescents, balls, cups, ropes . . . really any shape desired. Jam thumbprints, fortune cookies, and snickerdoodles are just a few of the cookies that hands work to shape. Try to handle the dough as little as possible to prevent tough cookies. Remember, you want to eat them, not fight them.
For many hand-shaped cookie doughs, a bit of chilling goes a long way. Refrigerate the dough for just 15 minutes and you'll find it less difficult and sticky to shape. Then, moisten your hands with a touch of cool water before handling the dough. The water cools the temperature of your hands and will keep the cookies from sticking to your fingers. This way you won't have to add additional flour that could create textural changes in the baked cookie.
Though you may roll and shape different sized cookies from the dough, try to place like-sized cookies on the same baking sheet. This will ensure that your cookies bake evenly and are done all at once, instead of the smaller ones over-browning while the large ones are still doughy.
Fortune Cookies
 Rolled cookies: Gather your rolling pin and cookie cutters for this dough. You know these cookies . . . sugar cookies may be the most popular followed closely in preference by gingerbread men. Often, this cookie dough needs some chilling before you put the rolling pin to the task. Cover tightly with plastic wrap or a lid and refrigerate for at least one hour or up to a few days. This dough also freezes well. Chilling firms up the dough, making it easier to handle and less sticky. Rolled cookies: Gather your rolling pin and cookie cutters for this dough. You know these cookies . . . sugar cookies may be the most popular followed closely in preference by gingerbread men. Often, this cookie dough needs some chilling before you put the rolling pin to the task. Cover tightly with plastic wrap or a lid and refrigerate for at least one hour or up to a few days. This dough also freezes well. Chilling firms up the dough, making it easier to handle and less sticky.
Once chilled, remove the dough from the refrigerator and let it stand for 15-30 minutes at room temperature. If you roll the dough directly from the refrigerator, you'll notice cracking and breaking in your cookies. The dough is too cold. After it sets at room temp, it will be easier to handle. If it sets too long, it may become soft and sticky again. Simply put it back in your chilling unit. Divide the dough in half or quarter it so you are only working with a little dough at a time. Keep the remaining dough in the refrigerator until you are ready to roll it out, or freeze it for later use.
An easy way to roll out dough with less mess entails sandwiching it between two sheets of lightly floured wax paper. Place your rolling pin in the center of the dough and roll out to the edges. Don't run the pin back and forth over the dough, as this method is equivalent to handling the dough too much and can result in tough-textured cookies. Instead, bring the pin back to the center after each roll. Also, to aid in even rolling, turn the wax paper a quarter of a turn after each roll. Occasionally, lift the paper (both sides) to make sure it isn't sticking to the dough. Sprinkle the dough with additional flour as needed to keep it from sticking to the wax paper. Roll the dough to the desired thickness. A ruler can help you visualize the difference between 1/8" and 1/4" thickness.
If you prefer to roll the dough out on your counter-top, lightly dust the counter. Shape the dough into a 1/2"-thick rectangle and place it on the counter. Sprinkle it lightly with flour. Again, roll from the center to the edges, not back and forth. Give the dough a quarter turn after each up and down roll. When it becomes too large to turn, run an off-set metal spatula under the dough to prevent sticking. Sprinkle with additional flour as needed.
When the dough is rolled out to your liking, use a dry pastry brush to whisk away any excess flour.
Now comes the fun part: cookie cutters! Dip your cutters in flour before attempting to press them into the dough. Shake off excess flour. Press firmly into the dough, and swivel the cutter from left to right to make sure the cookie cuts away from the surrounding dough with clean edges. Using various sized cookie cutters will help you use up more of the dough and give you less dough scraps. The scraps, because they must be rolled again, become less tender to eat, so minimizing them is always a baker's quest. After using up the dough, gather the scraps into a ball. Chill in the refrigerator until firm enough to handle again. Either reroll and cut the scraps, or form the ball into a log, chill, and slice the excess dough into cookie circles.
No cookie cutters? No problem. Paper or thin cardboard and a small kitchen knife mixed with an ounce of imagination will bake up all sorts of delightful cookie shapes. Simply make a template of the shape you desire on the paper or cardboard. Cut out your pattern. Place it on the cookie dough and cut around it using an exacto knife or a small kitchen knife. Glasses, small bowls or measuring tools, cans . . . so many everyday items will work to cut dough into memorable shapes. My mom once made heart cookies for Valentine's Day using an empty, clean tuna can. She cut off both ends and bent that can into a heart shape. Her innovation inspires me, so I still keep that "homemade" cookie cutter among my treasures.
To prepare for baking, dip a metal spatula into flour, shake off excess, and lift the cookies to the cookie sheets. (Plastic spatulas will scrunch your dough and lead to misshapen cookies). To help your cookies bake evenly, especially when using a variety of cookie cutters, bake similar-sized cookies on the same sheet. Space them far enough apart to prevent them from spreading into each other during baking.
Jam-Filled Dainties
 Pressed cookies: Spritz away! Very soft cookie doughs and batters are pressed through cookie presses or pastry bags with fancy tips to make quaint and dainty jewels of buttery cookies. To make them lovely, you'll need a bit of practice, but they certainly are worth the effort. Pressed cookies: Spritz away! Very soft cookie doughs and batters are pressed through cookie presses or pastry bags with fancy tips to make quaint and dainty jewels of buttery cookies. To make them lovely, you'll need a bit of practice, but they certainly are worth the effort.
Before baking, top cookies with half a candied cherry, chopped nuts, or sprinkles. Alternatively, embellish cookies after baking by dipping the buttery treats in melted chocolate and then dunking them in coconut, chopped nuts, nonpareils or sprinkles. Dipping only half the cookie gives a "made-in-the-bakery" impression. A chocolate glaze, brushed on with a pastry brush, makes for another easy but stunning look. For the glaze, melt 4 ounces semisweet chocolate and 1/2 teaspoon shortening in the microwave or in a double-boiler. After brushing on the glaze, place the cookies in the refrigerator for about 10 minutes or until the glaze hardens.
Chocolate Dipped Orange Spritz
 Refrigerator cookies: This is the dough for those who want freshly baked cookies, but not all at once. It is also handy to pull from the freezer when company drops in and you'd like to serve a quick but homey treat. You can make the dough ahead of time, form it into long rolls, wrap tightly and refrigerate or freeze until firm. This dough will keep for up to six days in the refrigerator. When cookies are desired, you simply slice the chilled dough and bake. If the dough starts to flatten during slicing, rotate it to help it maintain its shape. Slice just one roll at a time, keeping the others chilled to maintain their shape. Refrigerator cookies: This is the dough for those who want freshly baked cookies, but not all at once. It is also handy to pull from the freezer when company drops in and you'd like to serve a quick but homey treat. You can make the dough ahead of time, form it into long rolls, wrap tightly and refrigerate or freeze until firm. This dough will keep for up to six days in the refrigerator. When cookies are desired, you simply slice the chilled dough and bake. If the dough starts to flatten during slicing, rotate it to help it maintain its shape. Slice just one roll at a time, keeping the others chilled to maintain their shape.
Wax paper will help you create evenly rolled cookies. Place a large rectangle of wax paper on the counter. Place the cookie dough on one half of the rectangle, and then drape the other half over the dough. With fingertips at the center of the dough (and on top of the wax paper), roll your fingers back and forth over the dough. The dough will start to form into a roll, and as it does, move your fingers out toward the ends of the dough, continuing the back and forth rolling motion. When the dough reaches the desired thickness and length and is cylindrical in shape, wrap the wax paper around it. Twist the ends tightly to seal and wrap the cylinder in another layer of wax paper, aluminum foil, or plastic wrap for an air-tight package. Store in the refrigerator or freezer until needed. If the shelves of your refrigerator or freeze are rigid, place the rolls in a loaf pan or on another flat surface so they won't become indented.
To make square cookies, line a rectangular or square pan with wax paper so that it extends over the sides. Press the cookie dough evenly into the bottom of the pan. Cover and refrigerate. Once chilled thoroughly, lift the wax paper and dough from the pan and peel off the paper. Cut the dough into rectangular strips, and then cut the strips into individual square cookies. Alternatively, stack the long rectangular strips atop each other and slice the cookies vertically for a striped effect. This contrast works especially well using different colored doughs, like vanilla and chocolate, for example.
For a decorative touch, roll the dough in sugar or nuts before slicing. Or, for even more magic, roll the dough around a favorite filling.
Icebox Sugar Cookies
No-bake cookies: More a candy than a cookie, these charmers are simple to whip up when your sweet tooth is calling. They also spare your house of the heat created by the oven. Cereal, nuts, dried fruit, and crushed candies are main stays in these cookies. Most need time to set up in a refrigerator, so make sure your sweet tooth knows the cookies won't be ready instantly.
Peanut Butter S'more No-Bakes.
* DVO welcomes your kitchen hints and cooking or nutrition questions! Email us and we'll post your hints and Q/A's in upcoming newsletters! *
|
|
|